Posted on — Leave a comment

POTA Club Logs Without Lost Credit: Mic-Passing, Operator Fields, Duplicates, and P2P Edge Cases

POTA Club Activation Logging: The Problem Behind Most Lost Credit

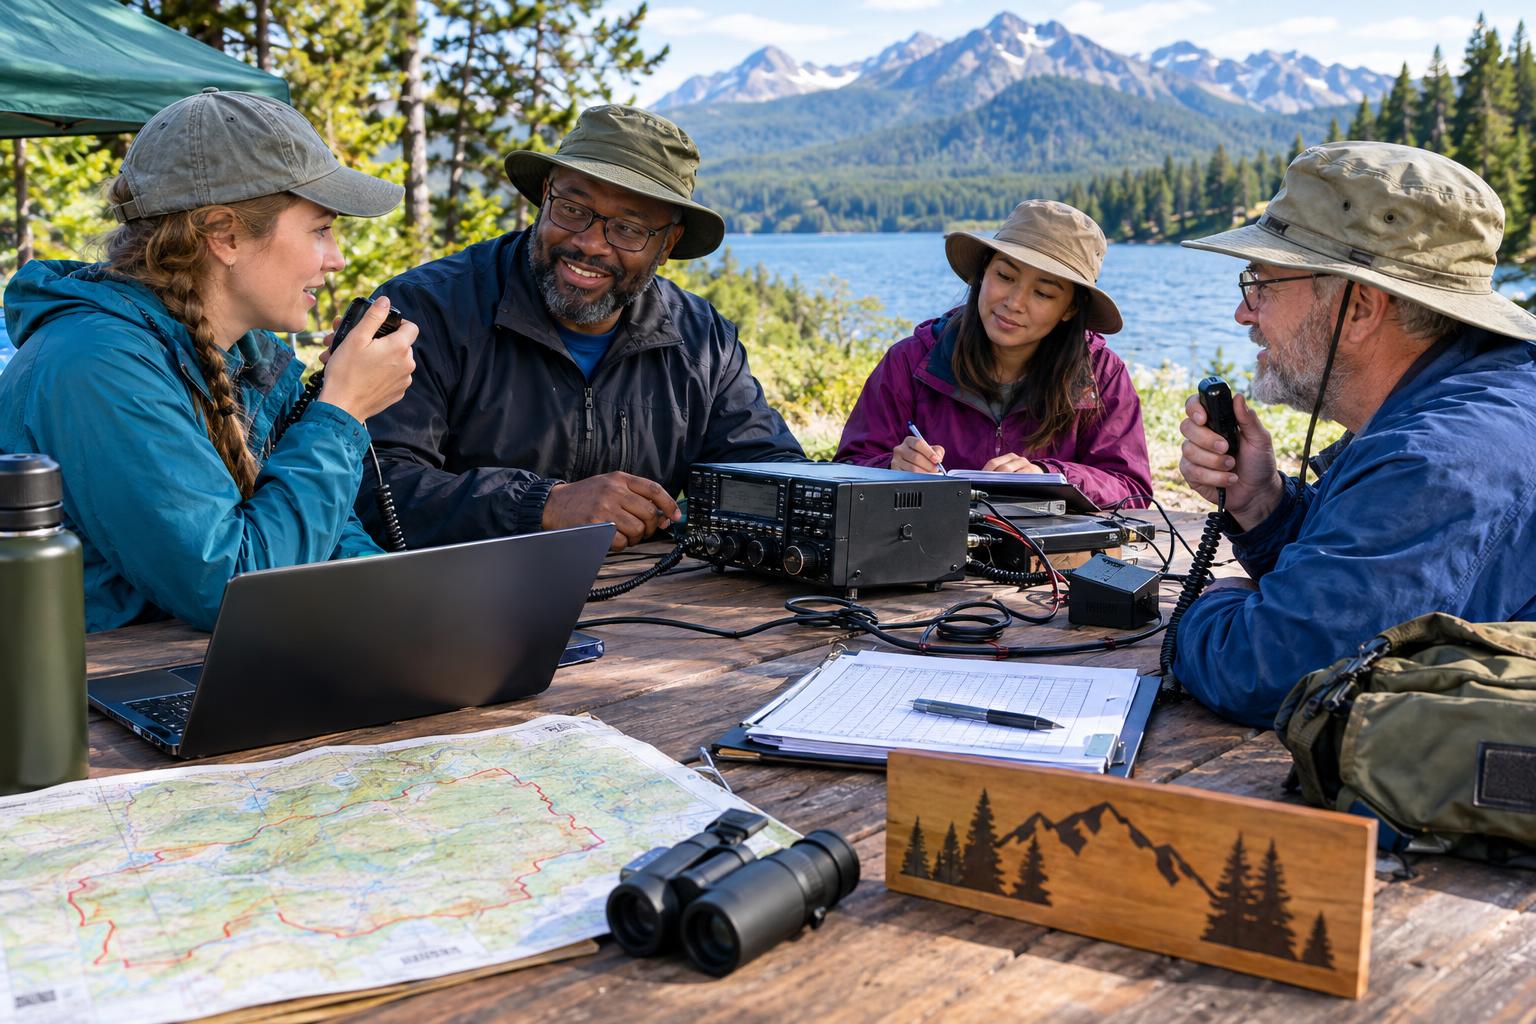
Parks on the Air club activations are great for training new operators, sharing equipment, and making a field day feel productive without turning it into a contest. They also create one of the easiest logging traps in POTA: several licensed operators, one station, one club callsign, multiple parks or park-to-park contacts, and a log file that may not say who actually made each QSO.

The essential rule is simple: the callsign used on the air and the person who actually operated must be represented correctly in the log. If the group uses a club callsign, the log needs to distinguish the station callsign from the individual operator. If several operators want activation credit, each operator must actually make contacts. The July and August 2026 POTA documentation updates clarified this point: credit is not created merely by being present at the activation site or by having your name on a group log.

This article focuses on practical, noncommercial guidance for POTA club activation logging: when to use the club callsign, how to pass the mic properly, which ADIF fields matter, how duplicates are treated, and how park-to-park edge cases can go wrong.

Start With the Callsign Used on the Air

Before anyone calls CQ, decide what callsign the station will transmit. That decision drives the entire log.

Using the club callsign

Use the club callsign when the group wants the activation to represent the club station on the air, when the club trustee or authorized control operator has permitted its use, and when the operators understand how credit will be assigned. In US amateur practice, remember that a club callsign does not remove normal FCC responsibilities. A properly licensed control operator is still responsible for the transmissions, operators must stay within the privileges allowed for the operation, and the station must identify correctly.

For POTA logging, the club callsign is typically the station callsign: the callsign sent over the air and heard by hunters. The individual at the microphone or key is the operator. If the log does not capture that distinction, POTA may not know which individual should receive activator credit.

Using each operator’s personal callsign

Use personal callsigns when each operator wants a clean, separate activation under their own call. This is often simpler for small groups: W1ABC makes contacts as W1ABC, then N2XYZ makes contacts as N2XYZ. Each operator keeps or exports a separate log using the callsign actually transmitted.

The tradeoff is on-air clarity. Hunters need to know which callsign they worked. If the group rapidly switches callsigns, announce the change clearly: for example, “This is now N2XYZ at K-1234.” Do not let hunters assume they are still working the earlier club or personal call.

The Mic-Passing Rule in Plain English

Mic-passing means the operator seeking credit actually takes control of the contact and completes QSOs. In voice operation, that literally may mean passing the microphone. In CW or digital operation, it may mean taking the key, keyboard, or logging/control position. The important point is not the physical object; it is who conducted the QSO.

If the club callsign is on the air and three operators want POTA activator credit, each of those operators needs their own creditable QSOs logged with that operator identified. One operator cannot make 30 contacts and then assign 10 to each person who happened to be at the picnic table. That is the kind of situation the POTA club guidance is intended to prevent.

A workable voice example

Suppose the club station is using W1CLB at park K-1234. The first operator, K1AAA, calls CQ and makes 12 contacts. The log entries show W1CLB as the station callsign and K1AAA as the operator. K1AAA has a plausible activation set if the contacts otherwise meet POTA requirements.

Then the group clearly changes operators: “Thanks, everyone. We are still W1CLB at K-1234, but the operator is now N1BBB.” N1BBB calls CQ, exchanges reports, and makes their own contacts. Those contacts should show W1CLB as the station callsign and N1BBB as the operator.

That is proper mic-passing. The hunters worked W1CLB on the air. The POTA log also tells the system which individual operator made each contact.

The ADIF Fields That Matter Most

ADIF field names vary in how logging programs display them, but the concept is consistent. For POTA club activation logging, pay close attention to these fields:

  • CALL: the other station you worked.
  • QSO_DATE and TIME_ON: the UTC date and time of the QSO.
  • BAND or FREQ: the band or frequency used.
  • MODE: the emission mode, such as SSB, CW, FM, or FT8, as exported by the logger.
  • STATION_CALLSIGN: the callsign used by your station on the air, such as the club callsign.
  • OPERATOR: the individual operator who made the QSO.
  • MY_SIG_INFO: commonly used to identify your activated POTA park reference.
  • SIG_INFO: commonly used to identify the other station’s POTA park reference in park-to-park contacts.

The most common club mistake is exporting a log where every QSO has the club callsign but no individual operator field, or where every QSO has the same operator even though several people took turns. Before uploading, open the ADIF file in a text editor or ADIF viewer and verify that the operator information changes where it should.

Duplicates: What They Are and Why They Cause Confusion

A duplicate is not merely “the same person worked twice.” In award and log processing, duplicates are usually evaluated by a combination of callsign, date, band, mode, park reference, and other fields. POTA’s system may de-duplicate records so the same contact does not produce repeated credit for the same award purpose.

For practical activation planning, do not rely on duplicate contacts to qualify a park. Aim for at least 10 solid, creditable QSOs for each operator seeking activation credit, and build in a cushion. If an operator makes exactly 10 contacts and two turn out to be duplicate, miscopied, outside the UTC day, or logged under the wrong operator, that operator may not receive the expected credit.

Duplicate scenario: same hunter, same band, same mode

If W1CLB works K9HNT on 20-meter SSB at 1800 UTC, and then the same operator immediately logs K9HNT again on 20-meter SSB at the same park, the second record may not help. It may be ignored as a duplicate for credit purposes. Logging “insurance duplicates” is not a reliable strategy.

Not necessarily a duplicate: different band or mode

If the same hunter works the activation on 20-meter SSB and later on 40-meter CW, those are different band/mode circumstances. They may be useful contacts when logged correctly. Still, every record must reflect what actually happened on the air. Do not manufacture band or mode differences to avoid duplicate handling.

Club Call or Personal Call? A Practical Decision Guide

Use the club callsign when the purpose is a club activation, training event, demonstration, or shared station effort, and the group can accurately log the individual operator for every QSO. It is also useful when the club wants hunters to find one consistent callsign on the spotting page and on the air.

Use personal callsigns when each operator wants a simpler path to individual activation credit, when the group lacks a logging setup that reliably exports OPERATOR fields, or when operators will be separated across different radios, bands, or parks. Personal callsigns reduce ambiguity, but they require disciplined on-air identification whenever the operator changes.

Avoid mixing approaches casually. If the first hour is under W1CLB and the second hour is under personal calls, create a written plan and separate the logs. Confusion at upload time is much easier to prevent in the field than to repair afterward.

Park-to-Park Edge Cases With Club Logs

Park-to-park contacts add another layer because both sides may be activating parks, and either side may be a club or multi-operator station. POTA’s park-to-park documentation explains how these contacts are represented in logs. The practical goal is to show both your activated park and the other activator’s park reference without creating false duplicate QSOs.

One QSO, one log record, multiple park references

If you work an activator who is validly in more than one POTA park, do not automatically create multiple identical QSO records unless the current POTA guidance and your logger’s export method specifically require that workflow. In many ADIF workflows, multiple park references can be represented in the appropriate POTA reference field. The key is to follow the current POTA upload guidance and avoid creating duplicate-looking records that the system may reject or collapse.

Club call on one side, personal call on the other

Suppose W1CLB at K-1234 works N5POTA at K-5678. Your log should show the callsign actually worked, N5POTA, and your own station callsign, W1CLB. If K1AAA was the individual operator at the club station, K1AAA belongs in the operator field. The other park reference belongs in the proper park-to-park field, not in a comment field that POTA cannot reliably parse.

Both sides are clubs

If both stations are using club callsigns, each side still needs to know its own operator. You normally do not need to know the other station’s individual operator for your own log credit; you need the callsign you worked and the park reference they provided. Your own log, however, must identify your operator correctly if individual credit is expected.

A Field Logging Workflow That Prevents Most Problems

Before the activation, create a simple written plan. List the park reference, the callsign to be used on the air, the operators present, the logger being used, and who is responsible for final upload. Confirm that the software can export STATION_CALLSIGN and OPERATOR fields correctly. If it cannot, decide whether separate personal-call logs are safer.

During the activation, announce operator changes clearly. Keep the logger synchronized with the person at the microphone, key, or keyboard. For each contact, record UTC time, band, mode, callsign, signal report if used, and park-to-park references when applicable. If the group changes from club call to personal call, stop and start a new log or clearly separate the records.

After the activation, inspect the ADIF before uploading. Look for blank operator fields, incorrect park references, local time instead of UTC, impossible band/mode combinations, repeated duplicate lines, and records assigned to the wrong callsign. A five-minute ADIF review can prevent days of confusion.

Common Mistakes That Lead to Lost or Misassigned Credit

  • Everyone gets credit for one person’s QSOs: Presence at the station is not the same as operating. Each operator seeking credit must make contacts.
  • The club call is placed in every field: The station callsign and operator are different concepts. Do not use the club call as a substitute for the individual operator when individual credit is intended.
  • Operator changes are not announced or logged: Hunters and log reviewers should be able to understand who was on the air and when.
  • P2P references are buried in comments: Put park references in the fields recognized by POTA-compatible ADIF workflows.
  • Exactly 10 contacts are treated as safe: Miskeys, duplicates, and wrong UTC dates happen. Log a reasonable cushion.
  • Separate parks are merged carelessly: Multi-park and two-fer activations require careful park reference handling. Follow current POTA guidance before uploading.

Safety and Regulatory Caveats

Club activations often involve temporary antennas, shared batteries, generators, coax across walkways, and operators with different experience levels. Keep feed lines out of footpaths where possible, secure masts against wind, respect RF exposure requirements, and use fusing appropriate to the battery and radio. Portable does not mean casual about electrical or RF safety.

Regulatory requirements vary by country. In the United States, operators should follow FCC amateur rules, license privileges, identification requirements, and any limits that apply to the control operator and transmitting station. Also follow park rules, posted restrictions, and instructions from land managers. POTA credit does not override local access, parking, antenna, or operating restrictions.

FAQ

Can a club callsign qualify a park for the club while individual operators also get credit?

Use the current POTA club guidance for the exact credit behavior, but the logging principle is clear: the callsign used on the air should be recorded as the station callsign, and the actual individual operator should be recorded in the operator field when individual credit is intended. Do not assume the system can infer operators from a shared club log.

Does every operator need 10 contacts?

If each operator wants their own activation credit, plan for each operator to make at least the required number of creditable QSOs under the applicable POTA rules. Build in extra contacts rather than stopping at the bare minimum.

Can one hunter work every operator as the mic is passed?

Yes, if each is a real QSO with the operator then at the controls and the log accurately reflects it. However, repeated same-band, same-mode contacts may not all create separate award value in every context. Avoid using rapid repeat contacts as the only path to qualification.

What if the operator field was wrong after upload?

Do not upload guesswork. Review the original log, station notes, and operator change times. If correction is needed, follow POTA’s current log correction or re-upload process rather than creating conflicting duplicate files.

Key Takeaways

  • For POTA club activation logging, separate the station callsign from the individual operator.
  • If a club callsign is used on the air, log the club call as the station callsign and the actual operator in the OPERATOR field.
  • Operators seeking credit must actually make QSOs; attendance alone is not enough.
  • Do not rely on duplicate contacts to qualify an activation.
  • Park-to-park contacts need correct park reference fields, not vague comments.
  • Inspect the ADIF file before upload, especially after mic-passing or multi-operator sessions.
Sources

Posted on — Leave a comment

Run an APRS Coverage Audit With a Soundcard TNC: Dire Wolf, Samoyed, KISS, IGate, and Packet Health

Why an APRS Coverage Audit Starts With Receive-Only Monitoring

An APRS soundcard TNC is one of the most useful diagnostic tools a VHF operator can build. Instead of guessing whether a local digipeater, IGate, antenna, or mobile setup is helping, you can listen to the 1200-baud AFSK APRS channel, decode packets, and inspect what is actually being heard.

In much of the United States and Canada, terrestrial APRS activity is commonly found on 144.390 MHz, but always verify local band plans, coordination practices, and your license privileges. The receive-first approach keeps the audit low-risk: no new RF transmitter, no added channel congestion, and no accidental path flooding while you are still learning what the local network needs.

The research hook for revisiting this in 2026 is timely. Dire Wolf continues to be actively maintained, with beta activity visible in its release history, and Samoyed is a pre-release Go-based packet TNC project worth watching. At the same time, APRS device-ID handling remains important because destination fields and software identifiers help the wider APRS ecosystem interpret what generated a packet. None of that replaces good RF practice, but it makes a careful audit more valuable.

The Basic Receive Chain

A practical APRS monitor has five parts:

  • Antenna: A simple outdoor 2-meter vertical usually outperforms a rubber duck indoors. Height and clear surroundings matter more than exotic gain claims.
  • Receiver: A 2-meter FM radio, scanner with suitable audio, or SDR feeding demodulated audio. If possible, use a fixed receiver rather than changing radios during the audit.
  • Audio interface: A USB sound card or radio interface with clean receive audio. Avoid overdriving the input; distorted AFSK audio reduces successful decodes.
  • Software TNC: Dire Wolf is the established choice. Samoyed may be useful for comparison, but treat pre-release software as experimental.
  • Logger or client: A terminal, KISS-connected application, or custom log process that records decoded frames for later review.

For an audit, stability matters more than complexity. Use one antenna location, one feed line, one receiver, and one audio path when comparing software. If you change several variables at once, you cannot tell whether a decoding difference came from the TNC, audio level, antenna, receiver squelch, or propagation.

Dire Wolf, Samoyed, and KISS in Plain Language

Dire Wolf

Dire Wolf is a widely used software TNC for AX.25 packet and APRS. It can decode AFSK audio from a sound card and present packets to applications using interfaces such as KISS or network sockets, depending on configuration. For coverage auditing, its value is that it can print decoded packets and diagnostic information in a human-readable way while also serving APRS clients.

Samoyed

Samoyed is a Go-based packet TNC project hosted on GitHub. Because it is described as pre-release, it should be approached as evaluation software rather than a proven unattended service component. That does not make it uninteresting. It may be useful for side-by-side receive experiments, code review, or learning how modern packet TNCs are being designed.

KISS

KISS is not an APRS format by itself. It is a simple way for a host application to talk to a TNC using AX.25 frames. In a coverage audit, KISS is useful because it separates the decoder from the application. The software TNC handles audio-to-packet work; the APRS program, logger, or IGate software handles interpretation, display, and network forwarding.

A key caution: if one decoder is connected by KISS to a full APRS client and another is only printing packets to a terminal, make sure you compare raw decoded frames, not just what appears on a map. Client filters, duplicate suppression, and APRS-IS behavior can hide important differences.

Set Up a Receive-First Audit Station

Start with a clean receive station before enabling any IGate or digipeater function.

  • Disable transmit: Do not connect PTT, VOX, or transmit audio until you have a reason to transmit and a verified configuration.
  • Open the squelch carefully: Many packet decoders prefer consistent audio. A tight squelch can clip packet starts; a fully open noisy channel can be fatiguing and may not help. Test what your receiver and decoder prefer.
  • Set audio conservatively: Too little audio produces missed decodes; too much produces clipping. Use decoder level indications if available and adjust gradually.
  • Use accurate time: Keep the logging computer synchronized. Time alignment is essential when comparing logs from multiple decoders.
  • Record configuration notes: Antenna type, approximate height, feed line, receiver model, audio interface, software version, and major settings.

Run the station long enough to capture typical local activity: commuting periods, quiet hours, weather packets, fixed stations, mobiles, and any special event or public-service traffic that happens to be present. Do not assume a 10-minute sample represents the network.

What to Log for Packet Health

Packet health is not a single official APRS score. For an audit, it is a practical set of observations that help you answer: who can I hear, how do packets travel, and where is the network wasting airtime?

For each decoded packet, log or preserve:

  • Timestamp: When your station received it.
  • Source call sign and SSID: The originating station.
  • Destination field: Often used by APRS software and devices for identification.
  • Path: Direct, digipeated, or involving WIDEn-N elements.
  • Payload type: Position, message, telemetry, object, status, weather, or other APRS information.
  • Decoder diagnostics: Audio level, error-correction notes, or other indicators if your TNC reports them.
  • Duplicate patterns: Same packet heard multiple times through different paths.

Do not overinterpret a decoder’s packet count by itself. A TNC that prints more lines may be printing duplicates, local noise artifacts filtered elsewhere, or packets your application later suppresses. Conversely, a stricter decoder may print fewer packets but provide cleaner output. Compare valid AX.25/APRS frames and inspect examples.

Comparing Dire Wolf and Samoyed Fairly

A fair comparison uses the same RF and audio source. The best method is to split the same demodulated audio to both programs using a virtual audio cable, operating-system audio monitor, or hardware audio splitter that does not load the receiver output. Avoid comparing one decoder on an outdoor antenna and the other on an indoor radio.

Use the same time window and save complete logs. Then compare:

  • Unique packets decoded by both programs.
  • Packets decoded by Dire Wolf only.
  • Packets decoded by Samoyed only.
  • Malformed or questionable frames, if reported.
  • Audio level sensitivity and stability over time.

When a packet appears in one log but not the other, look at context. Was there a collision? Was the audio weak? Was the receiver desensing from a nearby transmitter? Did one program start later? Did the operating system steal exclusive access to the sound card?

For a station you depend on, use stable software for unattended service and keep beta or pre-release software on a lab receiver until you understand its behavior. Experimental decoding is valuable; experimental unattended infrastructure on a busy APRS channel requires more caution.

Device-ID Handling and Why It Matters

APRS packets include a destination field that has long been used, in part, to identify software or device families. The APRS device-ID project tracks these identifiers so applications and network tools can interpret them consistently. This is not merely cosmetic. Device IDs help operators and developers understand what generated traffic, spot outdated configurations, and avoid collisions in identifier use.

For an audit, device IDs can help separate traffic types. A weather station, tracker, handheld, home station, software client, or TNC-based gateway may use recognizable destination patterns. However, do not treat device ID as proof of RF quality. A beautifully identified packet can still have a bad path, and an older station may still provide excellent coverage.

If you are developing software or configuring an application that generates APRS packets, use registered identifiers appropriately. If you are only receiving with a soundcard TNC, you generally are observing identifiers rather than creating them.

Deciding Whether an IGate Helps

An IGate receives APRS packets on RF and forwards them to APRS-IS, and some IGates also gate selected Internet traffic back to RF. A receive-only IGate can be genuinely helpful when it hears stations that otherwise do not reach the network. It can be redundant when it simply duplicates packets already heard by several nearby gateways.

Before enabling an IGate, ask:

  • Do I hear stations that are not otherwise being gated locally?
  • Is my antenna location filling a real geographic gap, such as a valley, highway segment, campus, or rural area?
  • Is my Internet connection stable enough for reliable forwarding?
  • Will my station identify correctly and comply with applicable amateur rules?
  • Am I prepared to monitor logs and fix misbehavior?

For two-way gating, be especially conservative. RF airtime is limited, and gating Internet traffic to RF can create unnecessary channel load if filters are broad or poorly understood. Follow current software documentation, local APRS coordination practices, and applicable FCC rules.

Deciding Whether a Digipeater Helps

A digipeater is more intrusive than a receive-only monitor because it retransmits on RF. It can extend coverage from mobiles and low-power stations, but it can also multiply congestion if placed where coverage is already dense.

Your receive audit should show one of three likely outcomes:

  • Clear gap: You consistently hear stations in an underserved area that are not reaching established digipeaters or IGates. A carefully configured fill-in digipeater may help.
  • Redundant coverage: Most packets you hear are already repeated or gated by nearby infrastructure. Another digipeater may add duplicates more than usefulness.
  • Channel stress: You observe heavy duplicate traffic, long paths, or frequent collisions. The solution may be better path discipline, antenna changes, or coordination rather than another transmitter.

Do not deploy a digipeater just because your station can. Coordinate locally where appropriate, understand WIDEn-N behavior, verify your call sign identification, and consider RF exposure, lightning protection, power reliability, and site access. A low, well-placed fill-in can sometimes be better than a high, wide-coverage transmitter that adds unnecessary repeats.

Common Problems That Distort an Audit

  • Clipped audio: Many missed decodes come from audio levels that look loud but are distorted.
  • Receiver overload: A strong nearby transmitter can reduce sensitivity even when the APRS frequency is correct.
  • Poor antenna placement: Indoor antennas near computers, LED lighting, and metal structures can make coverage look worse than it is.
  • Changing too many variables: Moving the antenna, changing sound cards, and switching decoders in the same session produces confusing results.
  • Map-only analysis: APRS maps are useful, but raw packet logs reveal paths, duplicates, and device fields that maps may hide.
  • Assuming silence means no need: A quiet area may lack APRS users, or it may lack coverage. Compare with mobile monitoring and local operator input before drawing conclusions.

Key Takeaways

  • An APRS soundcard TNC is ideal for a receive-first coverage audit because it lets you study RF activity before transmitting.
  • Dire Wolf remains a practical baseline; Samoyed is worth watching and comparing, but pre-release software should be evaluated cautiously.
  • KISS connects TNCs to applications, but it is not a substitute for understanding AX.25 paths and APRS payloads.
  • Packet health means more than packet count: examine paths, duplicates, unique stations, timing, and decoder diagnostics.
  • An IGate or digipeater helps only if it fills a real coverage gap without adding unnecessary RF congestion.

FAQ

Can I run an APRS audit without transmitting?

Yes. A receive-only monitor can decode packets and build a useful coverage picture without adding RF traffic. If you forward packets to APRS-IS or transmit as an IGate or digipeater, use your own valid call sign and follow current rules and software documentation.

Is Dire Wolf better than a hardware TNC?

Not automatically. Dire Wolf is flexible and often convenient because it uses a sound card and modern computer, but hardware TNCs can still be appropriate in dedicated installations. The right answer depends on receiver audio quality, stability requirements, operating environment, and maintenance expectations.

Should I use beta software for my main IGate?

For unattended infrastructure, stable releases are usually the safer choice. Beta and pre-release software are better evaluated on a separate receive station until you understand their performance and failure modes.

How long should an audit run?

Run long enough to capture the operating patterns you care about. A few hours may reveal basic local activity, while several days can show commuting patterns, weather stations, weekend mobiles, and intermittent coverage gaps.

Useful References

Posted on — Leave a comment

10-Meter Uplinks Are Back in LEO: Receive-First Setup for HADES-L and the Coming Fox-Plus Linear Birds

Why the 10 Meter Satellite Uplink Matters Again

For many satellite operators, LEO work has become almost synonymous with VHF and UHF FM or linear transponders. The renewed appearance of 29 MHz uplink activity in current AMSAT reporting changes that rhythm. A 10 meter satellite uplink brings HF-style antennas, smaller uplink Doppler, and familiar SSB/CW operating habits into low Earth orbit satellite work.

The practical point is not to rush onto the air. The better approach is receive first: identify which satellites are actually active, copy their downlinks, understand the transponder plan, build Doppler memories, and only then make a clean, courteous first transmission. That matters even more with small PocketQube-class spacecraft such as HADES-L, where downlink strength, commissioning status, and operating schedules can change quickly.

AMSAT’s public pages are the best starting point for this workflow. Use the AMSAT 2026 updates for news and context, the AMSAT Live Linear Satellites page to see what linear birds are being reported, the AMSAT satellite status page for recent operator observations, and the AMSAT project status page for development work such as Fox-Plus.

Current Satellites to Monitor: Start With HADES-L, Then Verify the Live List

HADES-L is the satellite to watch if your interest is specifically the return of 29 MHz uplink practice in LEO. It is associated with current PocketQube activity and has drawn attention because it gives operators a reason to think about 10 meters as an uplink band again.

However, satellite operating status is not static. A satellite may be launched, heard, commissioned, intermittently active, placed in a special mode, or temporarily unavailable. Published frequency tables can also be revised after launch or during commissioning. For that reason, do not treat any article, social media post, or saved radio memory as the final authority. Treat it as a planning aid only.

A practical monitoring priority list

  • HADES-L: Monitor first if your goal is 10 meter uplink preparation. Confirm the latest transponder information from AMSAT-linked sources and recent operator reports before transmitting.
  • Other live linear satellites: Use AMSAT’s live linear satellite page to identify active SSB/CW transponder satellites. Even if they do not use 10 meters, they build the same skills: pass prediction, Doppler correction, tuning discipline, and full-duplex awareness.
  • Fox-Plus development: Follow project status updates, but do not plan on transmitting through future spacecraft until they are launched, commissioned, and publicly opened for amateur use.

The smartest training path is to copy several active linear transponders receive-only before focusing on a 29 MHz uplink bird. You will learn how pass geometry, antenna pointing, polarization, and downlink Doppler sound in real time without adding your own uplink signal to the problem.

Confirm Live Status Before Every Session

LEO satellite operation rewards current information. A pass prediction only tells you when the satellite should be above your horizon. It does not prove the transponder is on, healthy, or open for general use. Before each operating session, make a short status check part of your station routine.

Step 1: Check the satellite’s official or AMSAT-linked information

Look for the current mode, frequency plan, and any notes about commissioning or restrictions. If the satellite is still in testing, do not transmit unless the controlling organization has explicitly invited amateur use.

Step 2: Check recent user reports

The AMSAT status page is useful because it reflects what operators are hearing. A series of recent “heard” reports is not a guarantee for your pass, but it is better evidence than an old frequency list. Pay attention to time, mode, and whether reports describe telemetry, beacon copy, or successful transponder operation.

Step 3: Listen before calling

On your first pass of the day, use headphones or a waterfall display and try to copy the beacon, telemetry, or passband. If you cannot hear the downlink, do not transmit. Transmitting into a satellite you cannot hear creates QRM and prevents you from knowing whether your signal is centered, too strong, or even being relayed.

What Changes When the Uplink Is on 10 Meters?

The biggest technical difference is Doppler. Doppler shift is proportional to frequency. A LEO satellite can produce a large enough shift on UHF that you must correct it throughout the pass. On 29 MHz, the shift is much smaller.

As an approximate example, using a relative velocity near 7.5 km/s, Doppler shift is about 700 to 800 Hz at 29 MHz and about 10 kHz or more at 435 MHz. Real passes vary, but the operating lesson is clear: with a 10 meter uplink and UHF downlink, most of your active Doppler correction will usually be on the UHF receive side.

That does not mean the 10 meter uplink can be ignored. On SSB and CW linear transponders, a few hundred hertz is audible. If you want to sound clean in the passband, you still need fine tuning, full-duplex monitoring, and a plan for whether the transponder is inverting or non-inverting.

Build Receive-First Doppler Memories

Before transmitting, build memories for listening. You can do this in a satellite-capable transceiver, a general all-mode rig, or an SDR receiver paired with tracking software. The exact frequencies must come from the current published satellite data, but the structure of the memory set is consistent.

For a UHF downlink

Program several receive memories around the published downlink or passband center. For a 435 MHz-class downlink, a common receive-only starting pattern is:

  • AOS early pass: published downlink plus about 10 kHz
  • Approaching mid-pass: plus about 5 kHz
  • Near TCA: nominal published frequency
  • Departing: minus about 5 kHz
  • Late pass: minus about 10 kHz

This pattern reflects what you hear from an approaching satellite: the downlink appears higher in frequency, then moves downward as the satellite passes overhead and recedes. Use smaller steps if your radio and software allow it. With SSB and CW, smooth tuning is usually better than large memory jumps.

For the 29 MHz uplink

Because uplink Doppler is much smaller on 10 meters, you can prepare a narrower correction range. Create memories or VFO notes around the published uplink frequency or passband segment, but expect final adjustment by ear while monitoring your own downlink. If the transponder is inverting, remember that tuning one direction on the uplink moves your downlink signal in the opposite direction within the passband.

A receive-first operator should not start by trying to transmit into the center of a busy passband. Instead, learn where the beacon and other stations appear, confirm the passband edges, and practice matching published Doppler predictions to what your receiver actually hears.

Station Setup for Monitoring HADES-L

A useful receive-first station does not need to be extravagant, but it does need to be stable and repeatable. The minimum practical setup is an all-mode receiver or SDR for the downlink, a tracking method for pass times, and an antenna that can hear weak UHF satellite signals.

Recommended receive-side pieces

  • Pass prediction: Use current TLE data from a trusted source and confirm the satellite name or catalog entry carefully.
  • Downlink receiver: Use an all-mode VHF/UHF radio or SDR capable of SSB/CW reception as required by the satellite mode.
  • Antenna: A small directional UHF antenna, such as a handheld Yagi or fixed az/el-capable antenna, will usually outperform a general shack antenna for weak LEO downlinks.
  • Audio or waterfall: Headphones help, and a waterfall can make Doppler drift, beacon traces, and passband activity much easier to understand.

For the future transmit side, a 10 meter antenna does not need to be exotic. A resonant vertical, dipole, or small beam may work depending on your location, pass geometry, and station limits. But do not assume that HF antenna success on terrestrial contacts automatically translates to satellite success. You still need clean audio, low distortion, correct frequency control, and the ability to hear your own downlink.

Full Duplex Is Not Optional for Good Linear Satellite Practice

Full duplex means you can transmit and hear the satellite downlink at the same time. For linear satellites, it is the difference between operating by evidence and operating by guesswork. Without full duplex, you cannot reliably know whether your signal is inside the passband, whether you are drifting across another QSO, or whether your uplink power is excessive.

For a 10 meter satellite uplink, full duplex can be arranged with separate radios, a transceiver plus SDR, or a satellite-capable radio that supports simultaneous receive and transmit on the needed bands. Test your station locally into dummy loads where appropriate, manage RF feedback, and keep computer audio paths simple. The first on-air satellite pass is not the time to discover that your receiver overloads when the 10 meter transmitter keys.

Operating Etiquette: Low Power, Clean Signal, Short Calls

Linear transponders are shared passbands, not private repeaters. Use the minimum power that produces a readable downlink. With small satellites, excessive uplink power can desensitize the receiver, capture attention unfairly, or make the passband unpleasant for everyone.

Start with receive-only passes. When you eventually transmit, make short calls, leave room between QSOs, and avoid calling over weak stations. If you hear yourself louder than everyone else, reduce power. If you cannot hear yourself at all, stop transmitting and solve the receive problem first.

Safety and Regulatory Caveats

In the United States, amateur privileges depend on license class, frequency, emission type, and applicable FCC rules. Other countries have different allocations and license conditions. Before using any 29 MHz satellite uplink, confirm that your license permits that frequency and mode, and that the satellite is open for amateur use.

Also treat 10 meter RF safety seriously. Evaluate RF exposure for your antenna, power level, duty cycle, and operating distance. Keep people away from energized antennas, use proper grounding and lightning precautions for outdoor antennas, and avoid temporary antenna setups that place wire or feed line near power lines.

Key Takeaways

  • A 10 meter satellite uplink reduces uplink Doppler compared with VHF/UHF, but it does not remove the need for careful tuning.
  • HADES-L is the current satellite to monitor for renewed 29 MHz uplink practice, but status must be verified before each session.
  • Use AMSAT live and status pages to separate active satellites from planned or intermittent ones.
  • Prepare Doppler memories receive-first, especially for UHF downlinks where the shift is much larger.
  • Do not transmit unless you can hear the satellite and monitor your own downlink.

FAQ

Can I use a normal 10 meter HF antenna for a satellite uplink?

Possibly, if it is resonant, safe, and suited to the pass geometry. A dipole, vertical, or beam may be usable, but the station still needs correct frequency control, clean audio, and full-duplex downlink monitoring.

Why should I monitor other linear satellites if I only care about HADES-L?

Other active linear satellites let you practice the same essential skills: finding passes, correcting Doppler, recognizing passband activity, and operating courteously. Those skills transfer directly to a 10 meter uplink satellite.

Do Fox-Plus satellites mean more 10 meter uplinks are guaranteed?

No. Fox-Plus project information points to more linear-transponder development and future practice opportunities, but operators should wait for launch, commissioning, and official operating details before drawing conclusions about specific frequencies or access.

What is the safest first goal?

Copy the downlink on several passes without transmitting. Log the pass time, maximum elevation, antenna used, Doppler settings, and what you heard. Once you can hear the satellite reliably, transmitting becomes a controlled technical step instead of a guess.

Posted on — Leave a comment

Solar Cycle 25 Downslide: How to Keep 10m and 6m in Play Without Chasing Dead Bands

Solar Cycle 25 Is Changing the 10m and 6m Game

Solar Cycle 25 ham radio propagation is no longer just a story about “the bands are back.” As NOAA and NASA’s solar-cycle pages were updated in November 2026, the practical message for operators is that Cycle 25 is near, at, or past its broad maximum. That does not mean 10 meters and 6 meters are finished. It means the easy, all-day openings become less dependable, and smarter band selection matters more.

The mistake is treating 10m and 6m as either “open” or “dead.” Both bands can produce excellent contacts during the downslide, but they often open by different mechanisms, at different times, and with shorter warning. If you use current solar and geomagnetic data before calling CQ, you can avoid wasting an afternoon on a dead band while still being present when the band cracks open.

For current context, use primary data pages such as NOAA Space Weather Prediction Center’s Solar Cycle Progression, NASA’s Solar Cycle Progression and Forecast, NOAA’s Predicted Sunspot Number and Radio Flux, and background reporting such as Radio World’s Solar Cycle 25 coverage for amateurs and shortwave listeners.

The Data That Actually Helps Before You Transmit

Solar data can look intimidating, but a small set of numbers tells you most of what you need for upper-HF and low-VHF operating.

Solar flux and sunspots

The 10.7 cm solar radio flux, often called SFI or F10.7, is a useful broad indicator of ionization. Higher flux generally supports a higher maximum usable frequency, especially on paths exposed to daylight. Sunspot number is related, but it is not a minute-by-minute operating tool. Think of flux and sunspots as the climate of the band, not the local weather.

For 10 meters, sustained higher solar flux can support F2-layer propagation on north-south, east-west, and transoceanic paths. For 6 meters, ordinary F2 propagation is much rarer, but strong cycle conditions can occasionally lift the MUF high enough for remarkable openings. As Cycle 25 declines, those 6m F2 chances become less common, while 10m can remain worthwhile on good days.

Kp, geomagnetic activity, and aurora risk

Kp is a planetary geomagnetic index. Low Kp usually favors stable F-layer propagation. Rising Kp can disrupt polar and high-latitude paths, reduce upper-HF reliability, and make a promising 10m day collapse quickly. On the other hand, disturbed geomagnetic conditions may create auroral opportunities on 6m for operators in suitable latitudes, though auroral signals are often raspy and better suited to CW, SSB, or specialized digital approaches than casual ragchewing.

X-ray flares and absorption

Solar flares can cause sudden shortwave fadeouts on the sunlit side of Earth. If 10m was lively and suddenly disappears, check the X-ray and alert products before blaming your antenna. A flare-driven fadeout can make upper HF sound broken for a while, even though the station is fine.

MUF clues

The maximum usable frequency is path-specific. A map or prediction that suggests a high MUF over one region does not guarantee your exact path will work. Still, MUF trends help decide whether to start on 10m phone, try 10m FT8, park on 6m, or move lower.

A Practical Decision Flow for 10 Meters

Ten meters is the main beneficiary of the solar-cycle peak and early decline. It is high enough to feel the downslide quickly, yet low enough that good F2 openings can continue well after maximum.

When 10m deserves your first call

  • Solar flux is supportive and has been reasonably steady for several days.
  • Kp is low to moderate, especially for polar or high-latitude paths.
  • The path is in daylight or near gray-line enhancement for the regions you want.
  • Beacon networks, spotting networks, or PSK/FT8 activity show real signals on nearby paths.
  • Lower bands are strong but crowded, making 10m an efficient alternative.

A good operating sequence is to check current solar flux and Kp, listen to 10m beacons or FT8 activity, call briefly on a mode appropriate for conditions, then reassess. If there is no trace of signals, do not call endlessly into silence. Move to a more likely path, mode, or band and return later.

Mode selection on a fading solar cycle

As the cycle declines, 10m openings often become thinner. SSB remains excellent when signals are strong, but CW and digital modes can reveal openings before voice becomes practical. FT8 is not magic, but it is an efficient propagation detector because many stations are watching the same small slice of spectrum. If FT8 shows decodes from the target region, try CW or SSB if signal levels support it.

For a simple example, suppose you are in the central United States on a winter morning. Solar data looks favorable, Kp is quiet, and you see 10m FT8 decodes from the Caribbean and South America. That is a rational time to try 10m SSB or CW toward the south. If there are no decodes, no beacons, and no waterfall traces, it is better to check 12m, 15m, or wait for the sun angle to improve.

How to Keep 6 Meters Realistic

Six meters is called the “magic band” because openings can appear suddenly, not because it ignores physics. During the Cycle 25 downslide, 6m operating should be based on multiple propagation modes rather than waiting only for classic F2.

Sporadic E remains the everyday opportunity

Sporadic E, or Es, can support strong 6m openings even when solar flux is not impressive. In North America, Es is most associated with late spring through summer and a smaller winter season, but exact timing varies. Es clouds are patchy, so one operator may work several states while another 100 miles away hears little.

Use 6m FT8, beacons, and regional reports as early warning tools. If short-skip signals appear at 400 to 1,200 miles, consider switching to SSB or CW while the opening is strong. Do not assume a quiet band at noon means the whole day is lost; Es can develop and vanish quickly.

Trans-equatorial propagation

Trans-equatorial propagation, or TEP, can support 6m paths crossing the geomagnetic equator, often favoring north-south paths and certain afternoon or evening windows. TEP is geographically selective. A station in Florida, Texas, or the Caribbean may have more practical access to some TEP paths than a station far north. Solar-cycle strength helps, but geometry matters.

Aurora and disturbed conditions

If geomagnetic activity rises, 10m F-layer paths may degrade, but 6m aurora may become possible for stations at suitable latitudes. Point antennas generally northward in the continental United States for auroral scatter, and expect distorted audio. CW often cuts through better than SSB. Observe your license privileges and band plans, and remember that auroral operation is not a substitute for normal local emergency communication planning.

Meteor scatter as the dependable fallback

Meteor scatter is not dependent on solar maximum in the same way F2 propagation is. Digital meteor-scatter modes such as MSK144 are commonly used on 6m by operators with appropriate software, timing discipline, and station setup. Random meteors can work, while major showers may improve odds. This is a better plan than staring at an empty waterfall waiting for rare F2.

Do Not Confuse “No Spots” With “No Propagation”

Spotting networks are helpful, but they are not the ionosphere. A band may look dead simply because no one is transmitting from your area toward the path you care about. Conversely, a cluster full of spots from another region may not help your location.

Use spots as one input. Pair them with actual listening, your own decodes, beacon reception, and solar data. On 10m, a lack of spots during a favorable solar day may be an invitation to call CQ. On 6m, a sudden burst of decodes from one direction deserves immediate attention because the opening may be short.

Station Setup That Helps Without Overbuilding

You do not need an extreme station to benefit from Cycle 25’s remaining upper-band opportunities, but small improvements matter.

  • For 10m: A resonant vertical, dipole, loop, or small directional antenna can all work. A rotatable beam helps, but it is not mandatory.
  • For 6m: A modest horizontal loop, Moxon, or small Yagi often improves results dramatically compared with a compromised multiband HF antenna.
  • Feed-line loss matters more on 6m than on lower HF. Use decent coax, keep runs reasonable, and weatherproof outdoor connections.
  • Keep receiver noise low. A noisy power supply, LED lamp, solar charger, or computer accessory can make a marginal opening invisible.
  • Log what did not work. Date, UTC time, solar flux, Kp, band, mode, and heard regions will teach you your local patterns.

For antennas, follow safe installation practices. Maintain clearance from power lines, secure masts properly, account for wind loading, and disconnect or protect equipment during lightning risk. Also evaluate RF exposure compliance for your power level, antenna gain, duty cycle, and operating distance. Technical capability does not override FCC rules, local ordinances, HOA restrictions, or the privileges of your license class.

A No-Chase Operating Plan

The goal is not to camp forever on a silent band. The goal is to sample intelligently.

Morning

Check solar flux, Kp, and alerts. If conditions are quiet and solar support is decent, sample 10m toward sunlit east-west or north-south paths. Use FT8 or beacons as a quick probe, then move to CW or SSB if signals support it.

Midday and afternoon

Watch for 10m F2 strength and 6m Es. In Es season, 6m may become the better band even if 10m sounds ordinary. If 6m decodes appear in clusters from one region, act quickly.

Evening

Try north-south 10m paths while daylight remains over the midpoint or target area. In suitable geography, consider TEP windows. If geomagnetic conditions are disturbed and you are far enough north, listen for 6m auroral signals.

When to quit

If current data is poor, Kp is elevated, there are no signals, and your calls produce no replies after a reasonable trial, move down in frequency. Fifteen, 17, 20, or 30 meters may provide better results. Leaving 10m or 6m is not failure; it is good operating.

Key Takeaways

  • Cycle 25’s downslide does not kill 10m and 6m, but it rewards operators who use current solar and geomagnetic data.
  • Ten meters remains the best upper-HF band for F2 openings as solar support gradually weakens.
  • Six meters needs a broader strategy: Es, TEP, aurora, and meteor scatter all matter.
  • Low Kp usually helps ordinary F-layer paths; disturbed conditions may hurt HF but create auroral VHF chances.
  • Use FT8, beacons, and spots as propagation indicators, not as proof that a band is universally open or closed.
  • Keep safety, RF exposure, licensing, and local installation rules in the plan.

FAQ

Is 10 meters still worth checking after solar maximum?

Yes. Ten meters often remains productive into the declining side of a solar cycle, especially on days with supportive solar flux and quiet geomagnetic conditions. The difference is that openings may be less frequent, shorter, or more path-specific.

Does a high solar flux guarantee 6m F2?

No. High solar flux improves the odds of higher MUF, but 6m F2 is still uncommon and path-dependent. Treat it as a bonus, not the foundation of your 6m plan.

What is the fastest way to tell if 6m is alive?

Check local receiver noise first, then monitor 6m FT8, beacons, and regional reports. If you see multiple decodes from similar distances or directions, there may be an Es or other opening worth pursuing.

Should I call CQ on a quiet band?

Briefly, yes, if the data supports a possible opening. But do it with a plan: call for a few minutes, listen carefully, try a sensitive mode, and move on if there is no evidence of propagation.

Posted on — Leave a comment

ADIF 3.1.8 Cleanup: Make Portable, SOTA, LoTW, and DXCC Fields Survive Every Upload

ADIF 3.1.8 logging matters most when a perfectly good QSO fails to earn the award credit you expected. The radio contact may be valid, the confirmation may arrive, and the operator may have done everything right on the air, yet a missing summit reference, wrong station location, stale DXCC code, or malformed time field can make an upload fall short.

ADIF 3.1.8 was released on October 12, 2026, with the current field definitions operators should audit before bulk uploads. The practical goal is not to memorize the entire specification. It is to make the small set of fields that affect portable operation, SOTA, LoTW, and DXCC survive the trip from your logger to every service that reads your file.

Start With the Rule That Saves the Most Trouble

ADIF is an interchange format. It is not the final authority on every award program, and it does not force every upload site to use every field. A clean ADIF file can still be interpreted differently by different services. That is why the safest workflow is to maintain one accurate master log, export a small test batch, inspect the ADIF text, and only then upload the full file.

A typical ADIF record uses named fields with a length value, followed by <EOR> at the end of the contact. For example, <CALL:5>K1ABC says the CALL field contains five characters. If you hand-edit a value and do not update the length, some importers may truncate, reject, or misread the field. If your logging software exports the file, let the software calculate field lengths whenever possible.

The Core QSO Fields Every Award Upload Needs

Before chasing SOTA or DXCC-specific problems, confirm the basic QSO identity fields are correct. Most matching and credit systems depend on these first:

  • CALL: the other station’s call sign as worked, not your own call sign.
  • QSO_DATE: UTC date in YYYYMMDD format.
  • TIME_ON: UTC start time, commonly HHMM or HHMMSS depending on the export.
  • BAND and FREQ: band and frequency should agree. If your logger stores both, do not let one say 20 meters while the other implies 40 meters.
  • MODE and SUBMODE: use current ADIF values. For digital modes, the submode can matter.
  • STATION_CALLSIGN: the call sign you used on the air, especially important if you operated portable, with a club call, as a guest operator, or under a special event call.
  • OPERATOR: the control operator or person who made the contact, useful when the station call and operator are not the same.

Many failed uploads trace back to UTC confusion. If you log a local evening QSO after 0000 UTC, the date may be tomorrow in the log even though it felt like today at the operating position. Award systems generally care about UTC because both sides must match the same contact.

Portable Operation: Preserve Where You Were, Not Just Who You Worked

Portable logs often fail because the contact record accurately says who you worked, but not where you were when you worked them. That matters for grid, state, county, park, summit, and station-location-dependent awards.

Audit these station-side fields when exporting portable contacts:

  • MY_GRIDSQUARE: your Maidenhead grid at the operating site. Use enough precision only if it is correct.
  • MY_STATE: your state or primary subdivision, where applicable.
  • MY_CNTY: your county, when supported and relevant.
  • MY_COUNTRY and MY_DXCC: your country/entity, useful for stations that operate from more than one DXCC entity.
  • MY_LAT and MY_LON: useful for detailed portable records, but do not invent coordinates. If you were not sure, leave them out or correct them before export.
  • STATION_CALLSIGN: the exact call sign used over the air, including portable call sign practices where they are actually part of what you sent or logged.

A common mistake is to import a portable activation into a home-station profile. The resulting ADIF may show your home grid, home county, or home state. That can damage downstream award credit even if the QSO itself is otherwise correct. Create separate station profiles or locations in your logger for home, rover, SOTA, POTA-style portable, vacation, and club operations.

SOTA Fields: Activator and Chaser Data Are Not the Same

SOTA-style logging requires careful separation between the summit you activated and the summit or reference associated with the other station. In ADIF practice, station-side and contacted-station-side fields must not be swapped.

  • MY_SOTA_REF: the summit reference for your own operating location when you are the activator.
  • SOTA_REF: the other station’s summit reference when the contacted station is associated with a summit.
  • MY_SIG and MY_SIG_INFO: general station-side special-interest fields that some operators use for award references when a more specific field is not available or not supported by a target importer.
  • SIG and SIG_INFO: corresponding fields for the contacted station’s special-interest information.

For a summit-to-summit QSO, both sides may matter. Your contact might need MY_SOTA_REF for your summit and SOTA_REF for the other summit. If your logger has a single field labeled “SOTA,” check the exported ADIF to see which ADIF field it actually creates.

LoTW: Match the QSO, Then Match the Station Location

Logbook of The World is often discussed as if it simply consumes whatever ADIF fields are present. In practice, the station location associated with the signed upload is critical. Your ADIF export and the station location selected during the signing/upload process need to describe the same operation.

Before uploading portable contacts to LoTW, check:

  • The call sign used: does the ADIF STATION_CALLSIGN match the call sign/certificate context you are using?
  • The operating location: does the selected LoTW station location correspond to the state, county, grid, and DXCC entity of the portable site?
  • The time range: are contacts signed under the correct certificate and valid operating period?
  • The QSO facts: date, time, band, mode, and call must be close enough to match the other operator’s upload under LoTW rules.

If you worked from three counties in one day, do not upload all contacts under a single home or generic portable location unless that location truly represents every QSO. Split the ADIF by operating location or use logging software that exports location-specific batches. When LoTW processing appears delayed, check the official ARRL Logbook Queue Status rather than repeatedly changing a file that may already be waiting in the queue.

DXCC Fields: Keep Entity Data Current Without Overwriting Reality

DXCC credit depends on the contacted station’s entity, not just the letters in the call sign. Prefixes are helpful clues, but they are not always enough. Portable operations, remote stations, special event calls, historical entity changes, and ambiguous prefixes can all produce mistakes.

Review these fields carefully:

  • DXCC: the ADIF DXCC entity code for the contacted station.
  • COUNTRY: the country/entity name as stored by the logger.
  • CONT: continent.
  • CQZ and ITUZ: CQ and ITU zones, if known.
  • STATE, CNTY, and GRIDSQUARE: useful for domestic and grid-based awards, and sometimes relevant to cross-checking location.
  • QSL_RCVD, LOTW_QSL_RCVD, and related confirmation fields: confirmation status should not be treated as proof that the entity field is correct.

Do not bulk-update DXCC fields blindly from a prefix lookup without reviewing exceptions. A better cleanup method is to filter for missing or suspicious entities, correct those QSOs, export a test file, and confirm that the target system interprets them as expected. The ARRL DXCC and LoTW FAQ is the appropriate starting point for how DXCC and LoTW interact.

A Safe Cleanup Workflow Before a Bulk Upload

Use this process before sending hundreds or thousands of contacts to an award or confirmation service:

  • Back up the original log in your logger’s native format and as an ADIF export. Do not perform cleanup on your only copy.
  • Update your logging software or at least confirm that its ADIF export supports the current fields you need.
  • Export a small sample containing one home QSO, one portable QSO, one SOTA QSO if applicable, one DX contact, and one digital-mode QSO.
  • Open the ADIF in a plain-text editor and inspect field names, field lengths, UTC dates, times, band/mode values, and station-side fields.
  • Validate field spelling against the current ADIF specification at ADIF Current.
  • Upload the sample first if the service allows it, then check whether the imported record shows the expected location and award data.
  • Split by station location before LoTW signing or any upload process that depends on where you operated.
  • Only then export the full batch, keeping the exact file you uploaded for future troubleshooting.

This workflow is slower than clicking “upload all,” but it prevents the hardest category of logging problem: a large batch of contacts imported under the wrong location or with systematically wrong award fields.

Example: One Portable Summit Contact

Suppose you operated as W1ABC from a summit in Colorado, worked N5XYZ on 20-meter SSB, and want the record to support both ordinary QSO matching and summit credit. The cleaned record should clearly identify the other station, the UTC contact details, your station call, your portable location, and your summit reference.

The important idea is not the exact fictional call signs. It is field ownership. CALL is N5XYZ. STATION_CALLSIGN is W1ABC if that is what you used. MY_STATE, MY_GRIDSQUARE, and MY_SOTA_REF describe your operating site. If N5XYZ was also on a summit, then SOTA_REF would describe N5XYZ’s summit, not yours.

Common Failure Patterns

  • Home location attached to portable contacts: fix by separating station profiles and re-exporting by location.
  • Local time exported as UTC: correct the logger’s time-zone handling before export; do not patch only one visible field.
  • Mode/submode mismatch: verify modern digital modes against the current ADIF enumeration.
  • Changed field values with old length tags: regenerate the ADIF from software or update the length correctly.
  • Summit reference in the wrong direction: confirm whether the field is yours or the contacted station’s.
  • Assuming LoTW uses every ADIF location field directly: check the selected station location and signing context.

FAQ

Should I edit ADIF by hand?

Small corrections are possible, but hand editing is risky because ADIF field lengths must match the value. For more than a few records, correct the data inside your logging program and export again.

Do I need both BAND and FREQ?

Many logs include both, and that is useful. They should agree. If frequency says 14.074 MHz and band says 40 meters, expect confusion somewhere in the import chain.

Will a correct ADIF file guarantee award credit?

No. ADIF is only the data exchange layer. Award rules, confirmation requirements, station-location handling, certificate status, and the other operator’s upload all matter.

Where should I check the official ADIF rules?

Use the ADIF site at adif.org.uk and the current specification page at ADIF Current. For LoTW and DXCC questions, use the ARRL pages linked above.

Key Takeaways

  • Audit station-side fields before portable, SOTA, and LoTW uploads.
  • Keep contacted-station fields separate from your own operating-location fields.
  • Use UTC date and time consistently.
  • Do not bulk-update DXCC data from prefixes without reviewing exceptions.
  • Split uploads by station location when the upload system depends on where you operated.
  • Check ADIF 3.1.8 field definitions before a large export, especially after software updates or award-program changes.

Good logging is part operating practice and part data hygiene. A careful ADIF 3.1.8 cleanup gives your QSOs the best chance to import cleanly, match correctly, and carry the award-credit details you earned on the air.

Posted on — Leave a comment

Meshtastic on Ham Frequencies: Set Ham Mode, Kill Encryption, and Test a Real Neighborhood Mesh

Meshtastic Ham Radio Mode: What It Changes—and What It Does Not

Meshtastic ham radio mode is best understood as a legal operating choice, not a magic range button. Meshtastic is a LoRa-based mesh messaging system. In the United States, many Meshtastic users operate in the 902-928 MHz ISM band under unlicensed FCC Part 15 rules. Licensed amateur radio operators may also experiment under Part 97 where amateur allocations apply, but the tradeoffs are important.

Under Part 97, amateur radio is for self-training, intercommunication, and technical investigation. It is not a private messaging service, a business tool, or an encrypted off-grid texting replacement. The major practical difference is this: if you operate your Meshtastic node as an amateur station, you must follow amateur rules, including identification and the prohibition on messages encoded for the purpose of obscuring their meaning.

That is why the phrase “set ham mode and kill encryption” matters. A Meshtastic node on ham frequencies should be configured so traffic is open, identifiable, and appropriate for amateur use. If your goal is private family messaging, business logistics, or encrypted tactical chat, ham mode is the wrong tool.

When Part 97 Helps—and When It Hurts

Ham mode can help when the goal is experimentation

Part 97 operation can be useful when a group of licensed hams wants to study LoRa propagation, compare antenna locations, build a neighborhood emergency communications layer, or integrate Meshtastic thinking with APRS and packet-radio habits. Amateur operation encourages plain-language station identification, open technical learning, and shared improvement.

It can also help remove ambiguity for ham-only exercises. Everyone knows the network is amateur radio, not a private consumer service. That makes it easier to keep traffic clean: call signs, test messages, tactical labels used responsibly, and no confidential content.

Ham mode can hurt when privacy or mixed licensing is required

Part 97 is a poor fit for private messages. FCC rules prohibit amateur stations from transmitting messages encoded for the purpose of obscuring their meaning, with narrow exceptions that do not make ordinary encrypted chat acceptable. The rule appears in 47 CFR §97.113.

Ham mode also complicates mixed groups. If your neighborhood mesh includes unlicensed family members, CERT volunteers without amateur licenses, or people who only want a simple text device, keep their transmitting devices out of amateur operation. They may use legal non-amateur services where permitted, but they should not transmit on amateur frequencies unless properly licensed and operating under the rules.

Step 1: Decide Whether This Node Is Part 15 or Part 97

Before touching a menu, decide the operating basis for each node. Do not mix assumptions.

  • Use Part 15-style operation when you need normal Meshtastic encrypted channels, non-ham participants, or consumer-style messaging within device and regulatory limits.
  • Use Part 97 amateur operation when licensed hams are intentionally experimenting, communicating openly, identifying properly, and avoiding prohibited content.

In the United States, the 902-928 MHz range overlaps the amateur 33-centimeter band, but amateur operators are not the only users there. Hams are secondary in portions of this spectrum and must avoid harmful interference to primary users. Local coordination, device certification issues, and international rules can differ. Always confirm current rules for your location and license privileges.

Step 2: Update and Review Your Meshtastic Settings

The Meshtastic documentation and Android user settings have been updated over time, so exact menu labels may vary by app version and firmware. The current starting point is the Meshtastic radio settings documentation at Meshtastic Radio Settings. The Android user radio settings source is also available in the Meshtastic project at Meshtastic Android radio user settings.

Use those sources as the current reference, but apply the legal logic consistently: if the node is being used as an amateur station, configure it so it does not obscure the meaning of messages and so station identification is practical.

Step 3: Put Your Call Sign Where It Belongs

Part 97 station identification is not optional. Amateur stations must transmit the assigned call sign at the end of a communication and at least every 10 minutes during a communication, as described in 47 CFR §97.119.

For Meshtastic, a practical approach is to set your node’s long name and short name to include your FCC call sign where the software allows. For example, a long name might be “KJ4ABC Porch Node” and a short name might be “KJ4ABC” or a shortened form that still supports clear identification where possible. If a field is too short for your full call sign, do not assume that a truncated label satisfies the rule by itself. Send plain-text identifying messages as needed and review how your node actually appears to other stations.

This is especially important for unattended or semi-unattended nodes. A hilltop, attic, or porch node that retransmits traffic is still part of an amateur station. The control operator should understand what it transmits, how it identifies, and how to shut it down if necessary.

Step 4: Enable Licensed Amateur or Ham Mode

In current Meshtastic apps, the relevant setting is commonly presented as a licensed amateur or ham-radio-related user setting. The exact path may change, so look under radio configuration and user settings rather than relying on a stale screenshot or old forum post.

After enabling the amateur setting, restart or reboot the node if the app or firmware requires it. Then verify the actual behavior. Do not assume the checkbox alone made your whole configuration legal. Check the channel encryption state, user identification, region/frequency settings, and any shared channel QR codes or URLs that may reintroduce a private key.

Step 5: Disable Encryption on Every Amateur Channel

This is the step many operators miss. Meshtastic supports encrypted channels for normal non-amateur use. That is useful in the right service, but it conflicts with ordinary amateur operation because the purpose is to obscure meaning from other listeners.

For a ham mesh, review each channel and remove the pre-shared key or select the app’s equivalent of no encryption. If your group uses a channel QR code or shared configuration link, generate it only after encryption is disabled. A single old QR code can quietly put everyone back on an encrypted channel.

Use a simple verification procedure:

  • Confirm the node shows amateur or licensed operation enabled.
  • Confirm every amateur channel has encryption disabled or no PSK set.
  • Confirm your call sign appears in the node identity where practical.
  • Send a plain message such as “KJ4ABC test message from porch node.”
  • Have another licensed operator confirm the message is readable and attributable.

Step 6: Choose Sensible Mesh Settings for a Neighborhood

A real neighborhood mesh is not built by turning every node into the loudest possible router. Good RF practice still matters. Start modestly and make one change at a time.

For a local test, place nodes where they can “see” the neighborhood: upstairs windows, porches, garages, or safe outdoor enclosures. Height usually matters more than raw transmit power. A small antenna at a better location may outperform a poor antenna buried behind appliances and foil-backed insulation.

Keep hop limits reasonable. Large hop counts can create unnecessary airtime and duplicate traffic. Avoid configuring every handheld node as infrastructure. If Meshtastic offers client, router, or repeater-style roles in your firmware, use infrastructure roles sparingly and only where a node is stable, powered, legal, and identifiable.

A Practical Neighborhood Mesh Test Plan

Here is a clean, repeatable test that does not claim any guaranteed range or performance.

1. Define the purpose

Example: “Three licensed operators will test whether homes on Oak Street, Pine Avenue, and the community center can exchange plain-text status messages using Meshtastic ham radio mode.”

2. Assign stations and locations

Use call signs, not nicknames alone. For example: KJ4ABC at home porch, N0XYZ at second-floor window, and W6QRS at the community center parking lot. If using temporary tactical labels such as “Shelter” or “Net Control,” pair them with call signs.

3. Standardize settings

All nodes should use the same region plan, compatible modem preset, same unencrypted channel, and clear call-sign identity. Do not change antennas, power, hop limit, and location all at once or you will not know what helped.

4. Send short, numbered test messages

Examples include “KJ4ABC test 001 porch,” “N0XYZ test 002 upstairs window,” and “W6QRS test 003 community center.” Keep messages brief. Record whether they were received directly or through another node if the app displays that information.

5. Try one improvement at a time

Move a node from a desk to a window. Then test. Raise an antenna a few feet. Then test. Change a modem preset only after recording the earlier result. This resembles good packet-radio troubleshooting: isolate variables, avoid guesswork, and document the network.

APRS, Packet Radio, and Meshtastic: Similar Habits, Different System

Meshtastic is not APRS, and a LoRa mesh is not a classic AX.25 packet network. Still, the operating culture overlaps. APRS and packet radio teach useful habits: identify clearly, avoid unnecessary beacons, use appropriate paths, and do not flood a shared channel.

If you experiment with gateways between Meshtastic and APRS or the internet, be especially careful. Do not blindly gate private, encrypted, third-party, or unidentified traffic into amateur systems. Make sure the content, identification, and control arrangements are legal and technically appropriate. A gateway is not just a convenience feature; it can become the point where a small configuration mistake is repeated widely.

Safety and Practical Caveats

LoRa nodes are usually low power, but station safety still applies. Use weatherproof enclosures outdoors, strain relief for cables, fused power leads where appropriate, and battery packs from reputable sources. Do not place lithium batteries in hot sealed boxes without considering temperature limits. For rooftop or mast-mounted antennas, follow safe ladder practices and keep all antennas away from power lines.

Amateur stations must also comply with applicable RF exposure requirements. A typical handheld LoRa node may be modest, but higher-gain antennas, elevated sites, amplifiers, or continuous operation deserve a proper review. Legal operation includes both the radio rules and basic electrical and outdoor safety.

Common Mistakes to Avoid

  • Leaving encryption enabled: This is the biggest ham-mode error. If the message content is intentionally obscured, it is generally not appropriate for ordinary Part 97 operation.
  • Using ham mode with non-ham transmitters: Every transmitting amateur station needs proper licensing and control.
  • Assuming the node name is enough ID: Configure call-sign identity, but also understand the actual Part 97 identification requirement.
  • Changing too many variables: Range testing becomes useless if you move the antenna, change power, change presets, and add routers at the same time.
  • Treating emergency use as guaranteed: A mesh is a tool to test and maintain, not a promise of coverage when infrastructure fails.

FAQ

Can I use Meshtastic ham radio mode for private family messages?

No. If privacy is the goal, amateur radio is the wrong service. Use a legal non-amateur option that permits encryption and fits your situation.

Does ham mode automatically increase range?

Not by itself. Range depends on terrain, antenna placement, noise, device settings, and network design. Better height and cleaner paths often matter more than a menu setting.

Can I use my call sign as the node name?

Yes, and that is a good practice for amateur operation. However, you should still understand and meet the identification rule in §97.119.

Should every home node be a router?

Usually no. Too many infrastructure nodes can increase congestion. Start with a few well-placed, stable, identifiable nodes and expand only when testing shows a need.

Key Takeaways

  • Meshtastic ham radio mode is for licensed amateur operation, not private encrypted chat.
  • Disable encryption on every channel used under Part 97.
  • Use your call sign clearly and follow the station identification rule.
  • Test your neighborhood mesh with short, numbered, plain-text messages.
  • Improve coverage methodically: location first, antenna second, settings last.

Used carefully, Meshtastic can be a useful amateur-radio experiment for local resilience, LoRa learning, and packet-style operating discipline. The best ham mesh is not the loudest or most complicated one. It is the one that is legal, understandable, maintainable, and tested by operators who know exactly what their nodes are transmitting.

Posted on — Leave a comment

Try M17 Without Guesswork: Receive-First Tests, OpenRTX Status, and Codec2 Neural Audio Developments

Why a Receive-First Approach Makes Sense for M17 Digital Voice

M17 digital voice is one of the more interesting developments in amateur VHF/UHF operating because it is built around openness: an open protocol, open tools, and the low-bitrate Codec2 speech codec. For hams who are used to FM repeaters, DMR, D-STAR, or System Fusion, M17 is worth understanding—but it should not be approached by guessing at software builds, radio firmware, or repeater settings.

A receive-first path is the safest way to evaluate it. You can learn what M17 signals look like, determine whether there is local activity, understand your decoding chain, and follow the status of radio firmware before putting any RF on the air. That matters because M17-related tools are still evolving, and some hardware or firmware combinations may be experimental, receive-only, or not suitable for casual transmitting.

The M17 Project’s October 2026 update on Codec2 neural enhancement, its project site, the OpenRTX repository, and tools such as Refcheck provide a practical starting point. The goal is not to promise instant contacts. The goal is to help you evaluate open digital voice in a careful, legal, technically informed way.

What M17 Is—and What It Is Not

M17 is a digital voice mode intended for amateur radio use, especially on VHF and UHF channels where FM and repeater operation are common. It uses digital modulation and Codec2 speech coding rather than analog FM audio. In practical terms, your transmitted speech is encoded into a digital bitstream, modulated onto RF, received by another station or repeater, and decoded back into audio.

The important distinction is that M17 is not merely “another programming codeplug” for an established commercial digital voice system. Its appeal is the open technical stack. That openness allows inspection, experimentation, and community development, but it also means beginners should pay close attention to version status, hardware support, and current documentation.

Do not assume that a radio advertised for one digital voice mode can automatically run M17. Do not assume that an experimental firmware build is suitable for your daily handheld. And do not assume that hearing a digital signal on a waterfall means it is legal or appropriate for you to transmit on that frequency. Technical capability and operating permission are separate issues.

Start by Finding Activity Before Building a Transmit Setup

The first question is simple: is there M17 activity you can actually hear from your station location? If the answer is no, you may still be able to learn using recordings, networks, reflectors, or lab setups, but you should not spend time modifying a radio before confirming your operating environment.

Check repeaters and local information

Begin with local repeater directories, club pages, and current frequency coordination information in your area. Then use Refcheck as one additional discovery tool. Treat all directory information as a lead, not as authority. Repeater modes, access methods, and operational status can change, and some systems are only intermittently active.

When reviewing a possible M17 repeater or gateway, note the following:

  • Frequency pair and offset, if listed
  • Whether the system is actually identified as M17-capable
  • Whether it is RF-accessible, network-linked, experimental, or receive-only
  • Any stated local usage expectations
  • Whether the information appears current

If you are unsure, listen first and ask local operators before transmitting. Many repeaters are coordinated under local or regional band plans, and amateur operators are still responsible for staying within their license privileges, following FCC rules in the United States, and observing good operating practice.

Use your existing VHF/UHF station as a monitor

If you have an all-mode receiver, SDR, scanner, or wideband handheld that can monitor the frequency, start there. You do not need a transmit-capable M17 radio to answer the first question: is there a signal present?

An inexpensive SDR receiver can be especially useful because you can see the channel visually. On a waterfall display, a digital voice signal will not look like analog FM speech. It will appear as a structured, channelized signal with consistent occupied bandwidth during transmission. You may not decode it immediately, but visual confirmation helps you distinguish silence, local interference, and actual digital activity.

A Practical Receive-First Test Plan

The following receive-first plan keeps the station simple and avoids unnecessary transmitting while you learn the mode.

Step 1: Build a stable receive chain

Use a suitable antenna for the band you are monitoring. For 2 meters, a simple outdoor vertical, attic ground-plane, or mobile whip near a window may be enough for strong local repeaters. For 70 centimeters, feed-line loss becomes more noticeable, so keep coax short where possible and use reasonable-quality cable.

Your basic chain can be:

  • Antenna appropriate to the target band
  • Coax and any needed adapters
  • SDR receiver or communications receiver
  • Computer with SDR software
  • Optional decoding or analysis tools

Avoid overloading the SDR. If you are near strong FM broadcast, pager, public safety, or other high-power transmitters, front-end overload can create false signals and poor decoding. Band-pass filters or attenuation may help in difficult RF environments.

Step 2: Confirm frequency accuracy

Digital modes are less forgiving of sloppy tuning than casual FM monitoring. Calibrate your SDR frequency correction using a known local signal, such as a NOAA Weather Radio transmitter, a known repeater, or another stable reference. The point is not lab-grade precision; it is to avoid chasing decode problems caused by a receiver that is several parts per million off frequency.

Step 3: Observe before decoding

Spend time watching the waterfall during known local busy periods. Evenings, club net times, and weekend operating windows may reveal activity that is invisible during a quick daytime check. Log what you observe: date, time, frequency, signal strength estimate, and whether the signal is continuous, intermittent, or repeater-like.

Step 4: Try decoding only after the signal path is clean

Once you have a stable signal and reasonable frequency accuracy, move to M17-specific decoding tools or workflows recommended by current project documentation. Software names, command options, and supported platforms can change, so use current documentation rather than relying on an old forum post or video.

If decoding fails, do not immediately assume the mode is broken. Common causes include incorrect sample rate, wrong audio routing, excessive receiver filtering, too little signal, front-end overload, frequency error, or attempting to decode a signal that is not M17.

OpenRTX Status: Useful, Promising, and Worth Checking Carefully

OpenRTX is an open-source firmware project for supported amateur radio hardware. It is important in the M17 discussion because firmware is one path toward practical M17-capable handheld operation. However, open firmware should be treated with the same care you would give any experimental radio modification.

Before flashing firmware or relying on a handheld for M17 digital voice, check the repository directly. Look for supported radio models, current build status, open issues, installation instructions, and warnings. Hardware support is not universal, and support for a particular radio model does not automatically mean every feature is complete or suitable for transmitting.

Use this decision table before touching a radio:

  • If your model is not clearly supported: do not flash it.
  • If the documentation says a feature is experimental: treat it as experimental.
  • If you need the radio for emergency, club, or daily analog use: do not risk your only working radio.
  • If you cannot restore factory firmware: stop until you understand the recovery path.
  • If you are not sure whether transmit behavior is correct: test only into a dummy load with appropriate attenuation and measurement equipment, or remain receive-only.

This is not meant to discourage experimentation. It is meant to keep experimentation responsible. A radio running development firmware is still a transmitter. Spurious emissions, incorrect deviation, wrong channel spacing, or improper operation can affect other users even when your intentions are good.

Codec2 and the Neural Audio Enhancement Question

M17 uses Codec2, an open low-bitrate speech codec associated with amateur digital voice experimentation. Low-bitrate codecs make tradeoffs. They are designed to carry intelligible speech using limited data rate, not to reproduce studio-quality audio. Under good conditions, a digital voice path can sound clean and consistent. Under marginal conditions, artifacts, dropouts, or robotic audio may appear.

The M17 Project’s October 13, 2026 post on Codec2 neural enhancer tests is relevant because it points to ongoing work on improving the perceived quality of Codec2-decoded speech. Neural enhancement generally means using a machine-learning-based process to improve or reconstruct aspects of decoded audio. That can make speech sound more natural in some cases, but it also raises practical questions for amateur use:

  • How much processing power is required?
  • Does it add noticeable latency?
  • Does it improve intelligibility, naturalness, or both?
  • How does it behave with noisy, clipped, accented, or weak-signal audio?
  • Is it suitable for embedded radios, desktop software, or only demonstrations?

For a beginner or intermediate ham, the key takeaway is simple: neural audio work is promising, but it should not be confused with a requirement for trying M17. You can evaluate M17 digital voice today by focusing on RF reception, signal quality, decoding tools, and local activity. Audio enhancement is an area to watch, not a reason to postpone learning the basics.

What to Log During Your First M17 Monitoring Sessions

A simple station log will help you separate real observations from impressions. Record:
  • Date and local time
  • Band and frequency
  • Receiver and antenna used
  • Estimated signal strength or S-meter reading
  • Whether the signal was direct, repeater, or unknown
  • Whether decode succeeded
  • Audio quality notes, without over-interpreting them
  • Software and firmware versions, if applicable

A good note might read: “Monitored 70 cm listed M17 repeater output from home vertical. Signal visible on SDR waterfall during two short transmissions. Decode not attempted. Need frequency calibration and current decoder setup.” That is far more useful than “M17 doesn’t work here.”
Safe Bench Testing Before Any On-Air Transmission

If you eventually reach the point of transmitting, move slowly. First, confirm that you are licensed for the band and emission type, operating within your privileges, and following current FCC rules and local band plans. Then test into a dummy load, not an antenna.

A sensible bench setup includes a dummy load rated for the transmitter power, short coax jumpers, an SDR or service monitor with suitable attenuation, and conservative power settings. Never connect a transmitter directly to an SDR input without enough attenuation; many SDR receivers can be damaged by very small amounts of RF power. When in doubt, do not connect it.

RF exposure rules also apply. VHF and UHF handhelds are low power compared with many base stations, but antennas close to the body, elevated duty cycle, and higher-gain antennas can matter. Follow current FCC RF exposure requirements and manufacturer safety guidance.

Troubleshooting: Common Receive-First Problems

“I see a signal but cannot decode it.”

Check that it is actually M17, not another digital mode. Confirm receiver frequency correction, sample rate, bandwidth, and audio routing. Try a stronger signal if available.

“The waterfall looks messy everywhere.”

You may have SDR overload. Add attenuation, improve filtering, reduce gain, or try a different antenna location. Strong nearby transmitters can make weak-signal work misleading.

“OpenRTX supports my radio, so can I transmit?”

Not automatically. Read the current OpenRTX documentation and issue tracker. Confirm the exact model, revision, feature status, and recovery method.

“Will neural Codec2 enhancement make weak RF links work?”

Do not count on it. Audio enhancement may improve decoded speech characteristics, but it does not replace adequate RF signal quality, correct tuning, and reliable decoding.

Key Takeaways

  • M17 digital voice is best approached as an open, evolving amateur radio mode rather than a plug-and-play appliance.
  • Receive-first testing helps you confirm local activity and learn the signal chain without risking poor transmissions.
  • SDR tools are valuable for observing frequency accuracy, signal presence, and RF problems before decoding.
  • OpenRTX is important but must be checked at the source before flashing or transmitting.
  • Codec2 neural audio work is promising, but basic RF and decoding discipline still come first.

FAQ

Do I need a special radio to listen for M17?

Not necessarily. You can begin with an SDR receiver or other suitable VHF/UHF receiving setup. Decoding may require M17-specific tools, but initial signal discovery can be receive-only.

Can I use any DMR handheld for M17?

No. Digital voice radios are not automatically interchangeable across modes. Some hardware may be usable with open firmware, but support depends on the exact model and current project status.

Is M17 only for repeaters?

No. Repeaters are one practical way to find activity, but M17 can also be explored through direct RF experiments and software-based workflows where legal and technically appropriate.

Where should I follow current M17 development?

Start with the M17 Project, the OpenRTX GitHub repository, and current repeater or mode listings such as Refcheck. Always verify details before transmitting.

Posted on — Leave a comment

Work SONATE-2 APRS in 2026: Paths, Live Packet Checks, and a One-Pass VHF Workflow

What Makes SONATE-2 APRS Useful in 2026?

SONATE-2 APRS gives VHF packet operators another current, non-ISS satellite digipeater to try when the pass geometry, satellite status, and local station setup line up. For hams who already understand ordinary terrestrial APRS, the satellite version is familiar but less forgiving: the pass is short, the RF path is moving fast, and a few unnecessary packets can crowd out everyone else.

The practical goal is simple: transmit a properly formatted 1200-baud APRS packet on the satellite’s published amateur frequency, have SONATE-2 digipeat it, and verify that it was heard either directly in your own receiver or through an internet-linked satellite APRS gateway. In 2026, the key habits are checking current status before transmitting, using the right path, keeping packets brief, and timing your transmissions instead of beaconing continuously.

Before you operate, confirm the satellite is currently active. AMSAT maintains a useful live digipeater satellites page, SatNOGS lists object and transmitter information for SONATE-2, NORAD 59112, the University of Würzburg provides SONATE-2 information for radio amateurs, and SpaceAPRS SONATE-2 packets shows recent reported DP0SNX activity.

The Core Station Setup

SONATE-2 APRS is a VHF packet exercise. You do not need a large satellite station, but you do need clean audio, accurate timing, and a way to aim or orient your antenna during a low-earth-orbit pass.

A practical station can be built from:

  • A 2-meter FM transceiver capable of operating on the published SONATE-2 APRS frequency. Always verify the current frequency from the satellite operator or a trusted satellite listing before transmitting.
  • 1200-baud packet capability, either through a hardware TNC, an APRS-capable radio, or soundmodem software such as Dire Wolf feeding an APRS client.
  • A directional VHF antenna, such as a handheld Yagi or log-periodic, or a good omnidirectional antenna with enough sky view. A directional antenna usually gives you a better link margin and helps reduce local interference.
  • Pass-prediction software using current orbital elements, so you know acquisition of signal, maximum elevation, and loss of signal times.
  • A receive check path, either your own receiver and decoder or a live packet display such as SpaceAPRS after the pass.

Full-duplex receive while transmitting is helpful because it lets you know whether your packet actually came back through the satellite. Many handheld stations are not truly full-duplex, so they rely on post-pass web checks or a second receiver. That is acceptable, but it makes disciplined timing even more important.

Use the Right APRS Path

The path is where many first attempts fail. For SONATE-2, watch the live packet stream and current operator guidance for the actual digipeater callsign and alias in use. Recent SpaceAPRS packet displays for this satellite show DP0SNX activity, and successful packets should show the SONATE-2 digipeater in the packet path after being repeated.

A practical starting point is:

  • Your call sign: your licensed amateur call sign, with an SSID if you use one, such as N0CALL-7.
  • Destination: a normal APRS destination such as APRS, or the destination format required by your APRS software.
  • Path: use the SONATE-2 digipeater path shown by current guidance and live packets, commonly represented in live packet displays by DP0SNX when the satellite repeats traffic.
  • Do not use terrestrial paths: avoid WIDE1-1, WIDE2-1, RELAY, or local fill-in digipeater paths for a satellite pass.

In plain terms, you want one satellite repeat, not a terrestrial APRS flood. A terrestrial path may be normal on 144.39 MHz APRS in North America, but it is not appropriate for a shared satellite pass. Keep the path short and specific.

Live Packet Checks Before You Transmit

Before pressing PTT, do a quick live-status check. This prevents two common mistakes: calling through an inactive satellite and using stale configuration details from an old forum post or saved radio memory.

Use this pre-pass check:

  • Check AMSAT’s active digipeater list. If SONATE-2 is not shown as active, investigate further before transmitting.
  • Check the official SONATE-2 amateur-radio page. Confirm the published mode, frequency information, and operating notes.
  • Check recent SpaceAPRS packets. Look for recent DP0SNX-related packets. A current packet stream is a strong sign that stations are successfully accessing the digipeater.
  • Check SatNOGS for satellite identity and transmitter data. This is useful for confirming that your tracking software and object number are aligned.

On SpaceAPRS, the important details are not just that packets exist, but how they appear. Look for your intended satellite path in the packet header, the time of reception, and whether several stations are already active. If the most recent successful traffic is old or sparse, treat the pass as experimental rather than routine.

A One-Pass VHF Workflow

The best way to work SONATE-2 APRS is to treat each pass as a short operating window with a plan. The following workflow assumes a single operator using a handheld directional antenna, a VHF FM radio, and a 1200-baud packet source.

Ten Minutes Before AOS

  • Open your pass-prediction program and confirm AOS, maximum elevation, azimuth track, and LOS.
  • Set the radio to the current published SONATE-2 APRS frequency and FM mode.
  • Confirm your TNC or soundmodem is producing clean 1200-baud AFSK audio without overdriving the transmitter.
  • Load one short APRS position packet or one concise message. Do not queue a long string of beacons.
  • Set your path to the current SONATE-2 digipeater path, not a terrestrial WIDE path.

At Acquisition of Signal

Listen first. If your station can decode received packets, watch for other traffic. Early in the pass, the satellite may be low on the horizon, and your signal may be blocked by trees, houses, terrain, or your own body if you are using a handheld antenna.

Do not immediately transmit repeated packets at AOS. Wait until the satellite is high enough to give you a reasonable path, especially if your antenna is modest. For many stations, the best chance is around the middle of the pass, not at the horizon.

Near Maximum Elevation

  • Aim the antenna carefully and account for polarization. If the signal fades, rotate the antenna rather than increasing packet rate.
  • Transmit one packet.
  • If you can hear your own digipeated packet, stop and log the success.
  • If you cannot confirm it, wait. Do not fire repeated packets every few seconds.
  • If the pass is quiet and geometry is still favorable, make one additional attempt after a reasonable pause.

With LEO satellites, Doppler shift exists even on VHF. For 1200-baud FM packet on 2 meters, many stations succeed without constant retuning, but marginal stations may benefit from small tuning adjustments during the pass if their radio and operating style allow it. If you do adjust, avoid creating more trouble than you solve; clean decoding matters more than chasing every small change.

After Loss of Signal

  • Stop transmitting immediately after LOS.
  • Check your local decoder log.
  • Check SpaceAPRS for your call sign and the SONATE-2 packet list.
  • Record the pass time, maximum elevation, antenna used, path used, and whether the packet was confirmed.

Post-pass notes are valuable because satellite APRS success is often about small improvements: cleaner audio, better antenna orientation, fewer obstructions, better timing, and less aggressive beaconing.

Packet Content: Keep It Short and Useful

Satellite APRS is a shared channel. Your packet should identify you and communicate something useful without occupying more airtime than necessary.

Good packet choices include:

  • A valid position report with grid square or location comment.
  • A brief status such as “EM12 via SONATE-2” or “CQ SAT APRS EM12.”
  • A short APRS message to a specific station, if you know that station is active and monitoring.

Avoid long comments, repeated automated beacons, telemetry-like experiments not intended for the digipeater, and any content that would be questionable under amateur rules. APRS by satellite is still amateur radio: identify properly, use permitted emissions and frequencies, and follow your licensing privileges.

Troubleshooting SONATE-2 APRS

You Do Not See Any Packets

Confirm the satellite is active, the pass prediction is correct, and the frequency is current. Make sure your tracking app is using the right object for SONATE-2. SatNOGS lists SONATE-2 as NORAD 59112, which is useful when checking that your software is not tracking the wrong satellite.

You Hear Packet Bursts but Decode Nothing

Reduce receive audio distortion, turn off aggressive audio processing, and check that your software is set for 1200-baud AFSK packet. If using a handheld radio speaker near a computer microphone, switch to a proper audio cable if possible. Packet decoders need clean levels more than loud levels.

Your Packets Are Not Repeated

Check the path first. Then check transmit audio. Overdriven AFSK is a common problem; the radio may sound loud but decode poorly. Also review antenna pointing, pass elevation, local obstructions, and whether you transmitted too early or too late in the pass.

Your Packet Appears Locally but Not Online

That can happen if no internet gateway heard the downlink, if the gateway path was blocked, or if the web display has not updated. A missing web hit is not absolute proof of failure. Conversely, a web hit is useful confirmation that at least one gateway copied the digipeated packet.

Operating Etiquette and Regulatory Cautions

Use the minimum practical number of transmissions. A single successful packet is enough. Satellite APRS passes are short, and many operators may be trying during the same few minutes. Do not run unattended high-rate beaconing through a satellite digipeater.

US operators should operate within FCC amateur rules, use their assigned call sign, avoid prohibited content, and comply with RF exposure requirements. Operators outside the United States should follow their national regulator’s rules. Satellite capability does not override licensing limits, band allocations, or local restrictions.
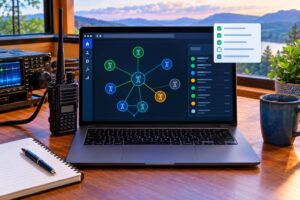
For physical safety, keep handheld directional antennas away from overhead power lines, use caution on rooftops or hillsides, and manage RF exposure when using higher power or antennas close to the body. Outdoor satellite operating often happens while looking upward; stay aware of traffic, footing, weather, and nearby people.

FAQs

Is SONATE-2 APRS the same as ISS APRS?

No. The operating concept is similar—VHF 1200-baud APRS through a spaceborne digipeater—but the satellite, callsign/path, activity status, and pass schedule are different. Do not assume ISS settings automatically apply.

Can I use an ordinary APRS handheld?

Possibly, if it supports the needed frequency, 1200-baud packet behavior, and manual path configuration. Many APRS radios are optimized for terrestrial APRS, so verify that you can set a satellite-appropriate path and avoid terrestrial WIDE paths.

How many packets should I send in one pass?

Start with one well-timed packet near a favorable part of the pass. If you do not confirm success and the channel is not busy, one additional attempt may be reasonable. Continuous beaconing is poor practice.

Do I need a high-gain antenna?

Not always, but a handheld directional antenna often improves your odds. A modest station with clean audio, correct path, and good timing can outperform a louder but poorly configured station.

Key Takeaways

  • Confirm SONATE-2 APRS activity from current sources before transmitting.
  • Use the current SONATE-2 digipeater path shown by official guidance and live DP0SNX packet evidence.
  • Avoid terrestrial APRS paths such as WIDE1-1 and WIDE2-1 for satellite operation.
  • Send short, useful packets and limit attempts during each pass.
  • Use live packet checks after the pass to verify success and improve your next attempt.

SONATE-2 APRS rewards preparation more than power. If your frequency, path, audio level, antenna pointing, and timing are right, one clean packet during a good pass can be enough. Check the live data, keep the channel courteous, and treat each pass as a short, shared VHF operating opportunity.

Posted on — Leave a comment

New POTA.app Field Checklist: Use the 2026 Map and Rove Tools Without Bad ADIF or Invalid Multi-Locs

Why POTA.app 2026 changes your field planning habits

POTA announced that the rebuilt pota.app went live on Oct. 15, 2026, after public beta testing. For activators, the practical value is not just a fresher interface. The useful shift is that the map, location planning, and rove-oriented workflow can help you catch problems before you are sitting at a picnic table with a wire in a tree, a weak phone signal, and a log that will not upload cleanly.

The goal is simple: use POTA.app 2026 as a pre-activation checklist tool, not just as a spotting page. A clean activation plan answers four questions before you call CQ: Am I inside the valid park boundary? Is this really a legal multi-location combination? Am I logging the correct reference for each QSO? Will my ADIF export tell the same story that my operating plan tells?

For official details, start with POTA’s announcement and documentation: New POTA.app Now Live, the POTA Rules, and the POTA Activator Guide. Treat this article as a field workflow, not a replacement for the current rules.

The clean-activation mindset

Many bad POTA logs are not caused by weak RF technique. They come from small planning mismatches: the operator was outside the park, the wrong reference was selected, a rove stop was merged into the previous stop, or a multi-location claim was based on nearby parks rather than overlapping valid operating locations.
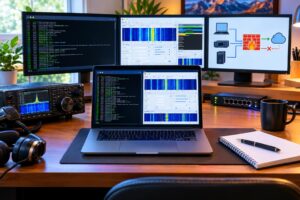
A clean activation has three matching records:

  • The physical reality: where your station, antenna, feed line, and operator were located while transmitting.
  • The POTA plan: which park reference or valid reference combination you intended to activate from that location.
  • The ADIF log: the date, time, band, mode, call signs, and POTA reference fields that document the contacts.
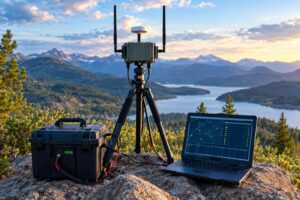
If those three do not agree, the map cannot rescue the log after the fact. Use the rebuilt site to reduce ambiguity before the first QSO.
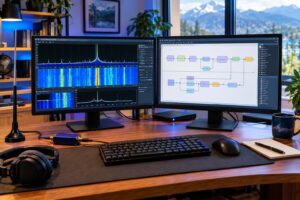
Pre-trip map checklist

Confirm the exact park reference

Before driving, search the park in POTA.app and confirm the reference, park name, entity, and status. Do not rely on a copied reference from an old note, social media post, or previous log file. Park names can be similar, and nearby units may have separate references.

Write the reference in your field notes exactly as shown by POTA. If you use computer logging, create the activation profile before leaving home. If you log on paper, pre-fill the page header with call sign, UTC date, park reference, grid if you track it, and planned operating bands.

Zoom in farther than seems necessary

A map is most useful when it prevents a boundary mistake. Zoom in and look for roads, parking areas, trailheads, water edges, and other practical landmarks near the park boundary. A convenient pull-off across the road may be close to the park but not inside it. For POTA, proximity is not the same as operating from the park.

Also remember that GPS and phone mapping are aids, not legal descriptions. If the operating spot is close to a boundary, use the best available official park information and choose a location clearly inside the unit. A 50-foot convenience gain is not worth an invalid activation.

Check access, hours, and operating practicality

POTA qualification and real-world access are different questions. A site can be valid for POTA yet impractical because of seasonal gates, parking restrictions, sensitive habitat, local antenna restrictions, wildfire closures, or poor cellular coverage. Use POTA.app for the POTA reference and map planning, then verify local access through the managing agency when needed.

For portable HF, mark at least two possible antenna locations. For example, identify one open area suitable for a 20-meter vertical and another place where an end-fed or linked dipole could be deployed without crossing roads, trails, or occupied campsites. If you arrive and the first area is crowded, you can move without improvising near the boundary.

How to plan a valid multi-loc

A multi-loc, or multi-location activation, is tempting because it can credit more than one reference from one operating position. The trap is assuming that two parks near each other automatically qualify. They do not. Your operating location must be valid for each reference you claim under current POTA rules and guidance.

Use the map to answer this question: Where exactly can my station sit while being inside all claimed locations? If you cannot point to a defensible operating position that satisfies that test, do not create a multi-loc log. Activate one reference, then move if you want to activate another.

Multi-loc field test

  • Identify each intended POTA reference on the map.
  • Look for true overlap or a clearly valid shared operating area, not just visual closeness.
  • Choose a specific operating spot and backup spot inside the valid area.
  • Save screenshots or written notes for your own planning, especially in complex boundary areas.
  • If the location is ambiguous, operate one reference only and keep the log simple.

The conservative choice is usually the cleaner one. Hunters want an accurate park reference more than a complicated claim. A single valid activation is better than a multi-loc that produces rejected QSOs or later corrections.

Rove planning without mixing your logs

Roving is efficient: several parks, one day, one portable station. It is also where logging mistakes multiply. The rebuilt POTA workflow can help you plan a sequence, but you still need a disciplined boundary between stops.

For each rove stop, create a separate mini-plan:

  • Stop name: Park reference and plain-English location.
  • Arrival decision: where you will park and where the operator and antenna will be.
  • Start marker: a fresh log file, new paper page, or clear line break.
  • End marker: final UTC time before teardown or movement.
  • Spotting plan: band, mode, and reference shown correctly before calling CQ.

Do not continue the same active log while driving from one park to another unless your logging software and personal workflow make the location change unmistakable. A QSO made at 1810 UTC from Park A and another at 1825 UTC from Park B should not look like one continuous activation from the same place.

ADIF fields that commonly cause trouble

ADIF, the Amateur Data Interchange Format, is the normal way many logging programs exchange ham radio contact data. It is flexible, which is useful, but that flexibility allows inconsistent exports. For POTA, the ADIF file must accurately represent who operated, when the QSO occurred, and which POTA reference was being activated.

Exact field requirements can change with POTA tools and guidance, so follow the current activator documentation. In practice, these are the areas to verify before upload:

  • Call signs: The contacted station call, your station call, and operator call should reflect the actual operation, especially for club calls or guest operators.
  • Date and time: Use UTC, not local time. Check date rollover during evening activations in US time zones.
  • Band and mode: Confirm that the logged band and mode match the contact. Do not let software default every QSO to the last band used.
  • POTA reference fields: Your activated reference and any park-to-park reference should be in the proper POTA-related ADIF fields according to current documentation.
  • Multi-location references: Only include multiple activated references when the operating position was valid for all of them.
  • Duplicates: Avoid accidental duplicate QSOs caused by importing both a computer log and a paper transcription.

A good habit is to open the exported ADIF in a plain-text editor before upload. You do not need to hand-edit every contact, but scanning the first few QSOs and the transition between rove stops often reveals wrong dates, wrong references, or an old station profile.

Example: one day, two parks, one possible overlap

Imagine you plan a Saturday activation with Park A in the morning and Park B after lunch. The map also shows an area where Park B appears close to another POTA reference, Park C. The cleaner workflow is:

  • Plan Park A as a normal single-reference activation. Create a log named with the UTC date and Park A reference.
  • After teardown, close the Park A log. Do not add travel QSOs or mobile contacts to that activation unless they comply with the program rules and your actual operating location.
  • At Park B, use the map to confirm whether your station location is valid for Park B only or for both Park B and Park C.
  • If the overlap is obvious and you are confident under current rules, configure the activation as a valid multi-loc before operating.
  • If the overlap is uncertain, activate Park B only. Save Park C for a separate operating position.

This approach prevents the most common rove problem: a log that looks efficient in the field but becomes hard to defend during upload review.

POTA and SOTA on the same trip

POTA and SOTA can pair beautifully: hike to a summit, work HF or VHF, then activate a nearby park. But the rules are not interchangeable. POTA is tied to designated park units and their valid boundaries. SOTA is tied to qualifying summits and the applicable activation zone under SOTA rules.

Do not assume that a summit inside or near a park automatically makes every contact valid for both programs. Before the trip, separately confirm the POTA reference and the SOTA summit reference. In the field, log the activation details clearly enough that you can export or submit to each program without inventing information later.

Also plan power and antennas realistically. A summit-friendly VHF handheld may be enough for local SOTA contacts in some areas, while a low-noise HF station may be better for POTA hunters. If you change bands, antennas, or operating positions between programs, mark that change in your notes.

Field checklist before calling CQ

  • My operator position and antenna are inside the intended POTA location.
  • The reference on my logger, spot, and paper notes matches POTA.app.
  • If claiming multiple references, this exact operating spot is valid for all of them.
  • My logger is using UTC date and time.
  • My station call and operator call are correct for this activation.
  • Band, mode, and power notes are set correctly.
  • My spotting text does not claim an uncertain reference.
  • I have a backup plan if the band is poor, the site is crowded, or access changes.

Safety and regulatory caveats

Portable operating still requires normal amateur radio judgment. Stay within your license privileges, band allocations, and applicable RF exposure requirements. Keep antennas away from overhead lines, roads, trails, and occupied areas. Secure masts and wires so they cannot fall into people, vehicles, or power conductors. Follow park rules, posted closures, fire restrictions, and quiet-hour expectations.

For battery power, protect terminals from shorts, use appropriate fusing, and keep lithium batteries out of excessive heat. For winter and mountain activations, radio planning does not replace weather, navigation, and personal safety planning.

FAQs

Does POTA.app 2026 make my activation automatically valid?

No. The app helps you plan and document, but validity depends on the current POTA rules and your actual operating location. Use the map carefully and resolve boundary questions before operating.

Can I fix a wrong park reference after upload?

Sometimes logs can be corrected, but that is not a planning strategy. It is far easier to prevent the mistake by checking the reference, location, and ADIF export before submitting.

Should I combine all rove contacts into one ADIF file?

Only if your workflow preserves the correct reference information for every QSO. Many activators find separate logs per park simpler and less error-prone, especially when moving between non-overlapping locations.

What is the safest rule for questionable multi-locs?

If you cannot clearly confirm that your operating position is valid for every claimed reference, do not claim the multi-loc. Activate one reference accurately, then move to a valid location for the next one.

Key takeaways

  • Use POTA.app 2026 before the trip, not only during spotting.
  • Plan from exact operating positions, not general park names.
  • Keep rove stops separated with clear log boundaries.
  • Claim multi-locs only when the same station location is valid for all references.
  • Inspect ADIF exports for UTC time, call signs, bands, modes, and POTA fields before upload.

The rebuilt site gives activators better tools, but the cleanest logs still come from disciplined field habits. Know where you are, know what you are claiming, and make sure the ADIF file says exactly that.

Posted on — Leave a comment

Move Beyond FM Birds: How to Work SSB/CW Linear Satellites Without Losing Your Downlink

Why linear satellites feel different from FM birds

If you already know how to work an FM amateur satellite, linear satellite ham radio is the next rewarding step. Instead of one FM channel where everyone takes turns, a linear transponder passes a slice of spectrum from its uplink to its downlink. Several SSB and CW signals can fit inside that passband at the same time, provided operators use reasonable power and stay aware of Doppler shift.

The big difference is this: on a linear satellite, you must hear your own downlink. Full-duplex monitoring is not a luxury; it is the feedback loop that tells you whether your uplink is inside the passband, whether your audio is intelligible, and whether Doppler has pulled you off frequency. Without it, you are guessing.

For current satellite choices and health reports, start with AMSAT’s live linear satellites page and AMSAT status. Those pages are especially useful because active satellites, operating modes, and user reports change over time.

The station you need: full duplex first, power second

A practical SSB/CW satellite station can be modest, but it needs the right capabilities. The essential pieces are:

  • An all-mode VHF/UHF transmit path capable of SSB and/or CW on the required uplink band.
  • An independent receive path for the downlink, preferably with headphones so you can hear your own signal while transmitting.
  • A directional antenna such as a handheld dual-band Yagi, log-periodic, or small crossed Yagi system.
  • Accurate pass prediction from satellite-tracking software or a reliable web/mobile tool using current orbital elements.
  • A way to tune smoothly, manually or with computer-assisted Doppler control.

Some operators use one full-duplex all-mode satellite transceiver. Others use two radios: one transmitting and one receiving. Either can work. What matters is that the transmit signal does not overload the receiver. If you use two radios, pay attention to receiver desense, physical antenna separation, filtering, and the possibility that a strong uplink signal may make the downlink seem to vanish.

Do not begin by adding more power. Begin by improving your receive system. Aiming, polarization, low-loss feed line, and careful tuning usually matter more than brute-force RF output.

Understand the passband before you call CQ

A linear transponder has an uplink passband and a downlink passband. Your signal enters somewhere in the uplink slice and appears somewhere in the downlink slice. Many amateur linear satellites use inverting transponders: a signal placed higher in the uplink passband appears lower in the downlink passband, and the sideband is inverted. In practice, operators commonly listen on USB downlink and use the uplink mode specified for that satellite and transponder.

Always check the current satellite information rather than relying on memory. The exact uplink, downlink, mode, and operational notes should come from a current source such as AMSAT. The AMSAT station and operating hints page is also a useful reference for practical setup concepts.

Doppler: the skill that keeps your signal readable

Doppler shift is the apparent frequency change caused by the satellite moving rapidly toward or away from your station. When the satellite approaches, the received downlink appears higher than its nominal frequency. As it recedes, the downlink appears lower. The effect is larger on 70 cm than on 2 meters, so a UHF downlink or uplink usually needs more attention.

There are two common ways to handle Doppler:

  • Computer-assisted control: Tracking software adjusts one or both VFOs during the pass. You still monitor your own downlink and make small corrections as needed.
  • Manual control: You tune by ear while watching the pass progress. This works well with practice, especially on SSB and CW.

The operating goal is simple: keep your downlink audio at a steady pitch. If your voice or CW tone slides upward or downward in your headphones, correct it. During a QSO, many operators prefer to leave the receive frequency stable relative to the station they are copying and adjust the uplink so their own downlink stays in place. This reduces the chance of chasing each other across the transponder.

A manual tuning example

Assume you have chosen a clear spot in the passband and can hear the satellite downlink. Before transmitting, tune the receiver until the noise floor and any nearby signals sound normal. Then transmit a brief, low-power test such as your call sign only. If you do not hear yourself, stop transmitting and adjust; do not keep calling blindly.

Once you hear your own downlink, fine-tune the uplink until your voice sounds natural or your CW sidetone matches the pitch you expect. As the pass continues, make small uplink corrections. Near the middle of the pass, changes may feel slower; near acquisition and loss of signal, they may feel faster and more unstable.

Choosing passes that help rather than punish you

Not every pass is a good training pass. Very low passes may be weak and obstructed by terrain, trees, or buildings. Extremely high overhead passes can have rapid azimuth changes that make handheld aiming and Doppler tracking harder. For early attempts, a moderate-elevation pass with a clear horizon and a quiet operating location is often easier.

Before the pass, note three things:

  • AOS, maximum elevation, and LOS: Know when the satellite rises, peaks, and sets from your location.
  • Direction of travel: Plan where your antenna will point at the start, middle, and end.
  • Likely footprint: Know which regions can hear the satellite at the same time so you can anticipate possible contacts.

For handheld antennas, practice the antenna motion before the pass begins. Keep the feed line managed, use headphones, and avoid juggling too many devices. A printed pass sheet or simple notepad can be more reliable than tapping through screens while the satellite is moving.

Power etiquette on a shared transponder

A linear transponder is a shared resource. Excessive uplink power can trigger satellite AGC behavior, raise the apparent noise floor, or reduce the quality of other users’ downlinks. The correct power is the minimum needed for a readable signal through the satellite.

A good rule is to compare your downlink to other signals and, where applicable, to the satellite beacon or expected passband level. Your signal should not dominate the transponder. If you are much louder than everyone else, reduce power, improve your aiming, or both.

  • Do not transmit FM into an SSB/CW linear transponder unless the satellite’s published mode specifically supports it, which typical linear SSB/CW operation does not.
  • Use short calls. “CQ satellite, W1ABC grid FN42” is enough.
  • Avoid tuning up on top of active QSOs. Find a clear spot and listen first.
  • Stop transmitting if you lose your downlink. Reacquire before calling again.

Making the QSO: what to say and what to log

Satellite SSB/CW contacts are usually brief because the pass is short and others may be waiting. A typical exchange includes call signs and Maidenhead grid squares. Signal reports may be exchanged, but grid information is often the key item for awards and personal tracking.

Example SSB exchange:

  • You: “CQ satellite, K8XYZ, Echo November Nine One.”
  • Other station: “K8XYZ from N5ABC, Echo Mike One Two.”
  • You: “N5ABC, roger EM12, you are 59 in EN91.”
  • Other station: “Roger EN91, thanks, 73.”

For CW, keep it even shorter: calls, report if desired, grid, confirmation, and 73. Use a speed that matches your ability to copy under Doppler and fading. A clean 12 to 18 wpm satellite CW contact is more useful than a fast exchange that neither station fully copies.

Your log should include UTC date and time, both call signs, both grid squares, satellite name, mode, band information, and propagation mode such as satellite if your logging software supports it. If you upload to confirmation systems or pursue awards, follow their current formatting rules for satellite names and grid entries.

Troubleshooting: when the downlink disappears

If you lose your downlink, avoid the instinct to increase power immediately. Work through the likely causes:

  • Antenna aim: Recheck azimuth and elevation. A few degrees can matter with a small Yagi.
  • Polarization mismatch: Rotate the handheld antenna slightly. Satellite signals can fade as polarization changes.
  • Doppler error: Sweep gently around the expected downlink while sending only very brief test transmissions.
  • Receiver overload or desense: Reduce transmit power, increase antenna separation, or improve filtering.
  • Wrong sideband or inversion assumption: Verify the satellite’s published mode and transponder notes.
  • Pass geometry: Buildings, terrain, or trees may be blocking the path.

If you cannot hear yourself after a few short attempts, stop and listen. You will learn a great deal by copying experienced operators’ signal levels, tuning behavior, and QSO rhythm.

Safety and regulatory notes

Operate only within your license privileges and the rules that apply in your jurisdiction. In the United States, that means observing FCC amateur rules, band allocations, permitted emissions, station identification, and RF exposure requirements. Portable satellite work can also involve trip hazards, vehicle surroundings, weather, batteries, and overhead power lines. Keep handheld antennas away from power lines, secure cables, and avoid operating where your attention to the pass could create a safety problem.

Key takeaways

  • Linear satellites reward careful listening more than high power.
  • Full-duplex monitoring is the central skill: hear your own downlink or stop transmitting.
  • Doppler is normal; correct it smoothly and keep your downlink audio stable.
  • Choose moderate, unobstructed passes while learning.
  • Use concise exchanges and log grid squares, satellite, mode, and UTC details accurately.

FAQ

Can I work linear satellites with an FM handheld?

Not for normal SSB/CW linear-transponder operation. You need equipment capable of the required all-mode uplink and downlink operation, plus full-duplex monitoring.

Is computer Doppler control required?

No. It is helpful, but many operators use manual tuning successfully. The requirement is not automation; it is the ability to hear and correct your own downlink.

How much power should I use?

Use the minimum power that produces a readable downlink. If your signal is much stronger than others, reduce power. Better antenna aiming often helps more than additional watts.

Where should I find current satellite frequencies?

Use current references such as AMSAT’s live linear satellite listings, AMSAT status reports, and the practical guidance at AMSAT-UK’s SSB satellite guide. Verify details before each operating session because satellites and operating status can change.